Opening your pantry to find bags of dried beans might feel a little intimidating compared to grabbing a can opener. But trust me, taking an hour or two once a week or every couple of weeks to batch cook a pot of creamy, delicious cannellini beans is a game-changer. Forget the sometimes metallic taste or mushy texture of canned beans. Home-cooked beans are vastly superior in flavour and texture, significantly cheaper, and put you in complete control of the ingredients, especially sodium.
Batch cooking dried beans, particularly versatile ones like cannellini, unlocks a world of quick, healthy, and satisfying meals throughout the week. Think hearty soups, vibrant salads, creamy dips, and comforting stews, all ready to assemble in minutes because the bean prep is already done. It’s one of those simple kitchen habits that pays off enormously in time and flavour.
Why Choose Cannellini Beans?
Cannellini beans, sometimes called white kidney beans, are fantastic candidates for batch cooking. They hold their shape reasonably well when cooked properly but also break down beautifully into creamy textures for dips or thickening soups. Their mild, slightly nutty flavour makes them incredibly versatile, happily soaking up the flavours of whatever dish they join. They’re nutritional powerhouses too, packed with plant-based protein, fibre, and essential minerals.
Getting Started: Sorting and Rinsing
Your journey begins with dried beans. You can find them easily in most supermarkets, usually in one-pound bags. Before you do anything else, spread the beans out on a light-coloured baking sheet or countertop.
- Sort: Look carefully for any shrivelled or broken beans, small stones, or bits of debris. It’s rare, but finding a tiny pebble in your finished dish is unpleasant! Discard anything that doesn’t look right.
- Rinse: Once sorted, place the beans in a colander and give them a thorough rinse under cold running water. This washes away any dust or field residue.
To Soak or Not To Soak?
This is a common question in the bean-cooking world. Soaking dried beans before cooking serves a few purposes:
- Reduces Cooking Time: Soaked beans cook faster and more evenly because they’ve already absorbed water.
- Improves Digestibility: Soaking can help break down some complex sugars (oligosaccharides) that can cause digestive discomfort for some people. Discarding the soaking water carries some of these away.
However, some cooks skip soaking, especially with fresher beans or when using a pressure cooker, arguing it affects texture or isn’t strictly necessary. If you skip soaking, expect a longer cooking time and potentially need more cooking liquid.
Soaking Methods:
- Overnight Soak (Recommended): Place the rinsed beans in a large bowl or pot. Cover with plenty of cold water – at least 2-3 inches above the beans, as they will expand significantly. Let them sit at room temperature for 8 hours or overnight.
- Quick Soak: If you’re short on time, place the rinsed beans in a large pot, cover with water (about 2 inches above), and bring to a boil. Boil vigorously for 2-3 minutes. Then, turn off the heat, cover the pot, and let the beans sit for 1 hour.
Important: After either soaking method, drain the beans completely and give them another good rinse before cooking.
Cooking Your Cannellini Beans: Choose Your Method
Now for the main event! You have options depending on your equipment and preference.
Stovetop Method
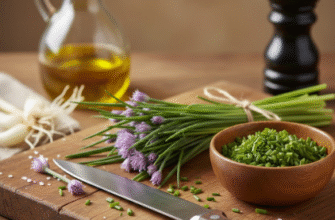
This is the classic approach. Place your soaked and rinsed beans in a large, heavy-bottomed pot. Add fresh water (or unsalted broth for more flavour) to cover the beans by about 2 inches. You can add aromatics now for flavour – think a halved onion, a few peeled garlic cloves, a bay leaf, or a sprig of rosemary or thyme.
Bring the water to a gentle boil, then immediately reduce the heat to low, so the water is just barely simmering. Partially cover the pot, leaving a gap for steam to escape. Simmer gently, stirring occasionally and adding more hot water if needed to keep the beans submerged. Cooking time will vary depending on the age and size of the beans and whether they were soaked, but start checking for tenderness after about 45 minutes for soaked beans (it could take 1.5 – 2+ hours for unsoaked). Beans are done when they are tender all the way through but not falling apart. You should be able to easily mash one between your fingers.
When to add salt? Add salt during the last 15-20 minutes of cooking. Adding it earlier can sometimes toughen the bean skins and slow down the cooking process.
Slow Cooker Method
Perfect for hands-off cooking. Place the soaked and rinsed beans in your slow cooker. Add fresh water or broth to cover by about 1-2 inches, along with any aromatics. Cook on LOW for 6-8 hours or on HIGH for 3-4 hours. Again, timing varies, so start checking for tenderness towards the end of the suggested range. Add salt during the last hour of cooking.
Pressure Cooker (Instant Pot) Method
This is the fastest way. Place soaked and rinsed beans in the inner pot of your electric pressure cooker. Add fresh water or broth to cover by about 1 inch (you need less liquid than stovetop as there’s minimal evaporation). Add aromatics if desired. Secure the lid, set the valve to sealing. Cook on high pressure for 8-12 minutes for soaked beans (unsoaked beans will need significantly longer, perhaps 25-35 minutes, but consult your cooker’s manual). Let the pressure release naturally (NPR) for at least 15-20 minutes before performing a quick release for any remaining pressure. Natural release helps the beans stay intact. Add salt after cooking, stirring it into the hot beans and liquid.
Verified Benefit: Taste and Cost. Cooking dried cannellini beans from scratch yields a noticeably creamier texture and cleaner flavour compared to canned varieties. Beyond taste, a pound of dried beans typically produces the equivalent of 4-5 cans of beans, offering significant cost savings. You also control the sodium content completely.
Cooling and Storing Your Batch
Once your beans are perfectly tender, proper cooling and storage are key to preserving their quality.
- Cool Down: Let the beans cool completely in their cooking liquid. This helps them stay plump and prevents the skins from drying out or splitting. You can speed this up by placing the pot in an ice bath if needed. Remove any large aromatics (like the onion half or bay leaf) before storing.
- Refrigerate: Transfer the cooled beans and enough of their cooking liquid to cover them into airtight containers. Store in the refrigerator for up to 4-5 days. The cooking liquid (sometimes called ‘pot liquor’ or ‘aquafaba’ if unsalted and thick) is flavourful and can be used in recipes.
- Freeze: For longer storage, freeze the beans. You can freeze them in their cooking liquid or drain them first (though storing with liquid is often preferred for texture). Portion them into freezer-safe containers or heavy-duty freezer bags. Leave a little headspace as the liquid will expand. They freeze beautifully and will last for several months (aim for 3-6 months for best quality). To use, thaw overnight in the refrigerator.
Putting Your Beans to Work
Having a stash of cooked cannellini beans ready to go makes weekday meals so much easier! Here are just a few ideas:
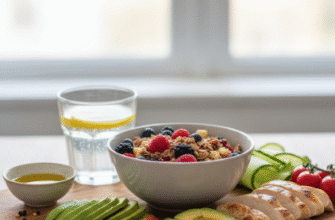
- Salads: Toss them into green salads, pasta salads, or grain bowls for a protein boost. A simple Mediterranean bean salad with chopped veggies, feta, and a lemon vinaigrette is fantastic.
- Soups and Stews: Add them to minestrone, pasta e fagioli, chili, or any vegetable soup. They add substance and creaminess.
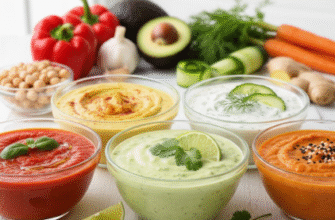
- Dips and Spreads: Blend them with garlic, lemon juice, tahini (optional), and olive oil for a classic white bean dip, or mash them onto toast with herbs and olive oil.
- Pasta Dishes: Stir them into pasta sauces or sauté them with greens like spinach or kale, garlic, and chili flakes to serve alongside pasta.
- Side Dishes: Simply warm them gently with olive oil, garlic, and herbs for an easy side.
Embrace the Bean Batch
Cooking dried cannellini beans from scratch might seem like an extra step initially, but the payoff in taste, texture, cost, and convenience is undeniable. Making it a regular part of your kitchen routine means delicious, healthy, home-cooked beans are always within reach, ready to elevate your meals from simple to satisfying. Give batch cooking a try – your future self will thank you!