
Content
The Magic of Bananas in Baking
Overripe bananas, often destined for the bin, are actually baking gold. That spotty, brown skin signifies peak sweetness and flavour, making them ideal for replacing some, or even all, of the refined sugar in recipes. The riper the banana, the sweeter your bake will be, naturally. This allows you to significantly cut down on added sugars, which is a huge win for creating healthier treats. But bananas offer more than just sweetness. Their high moisture content contributes to incredibly tender and moist cakes, muffins, and breads. Mashed bananas act as a fantastic binder, helping to hold ingredients together, sometimes even reducing the need for eggs or excessive fats. They blend seamlessly into batters, creating a smooth texture and imparting that distinct, comforting banana flavour. Furthermore, bananas bring their own gentle nutritional profile to the table. While we’re not making specific health claims, it’s commonly known they contribute things like potassium and dietary fibre. Using whole fruit adds a little extra goodness compared to just using refined flour and sugar. They transform simple ingredients into something more substantial and satisfying.Oats: The Versatile Baking Staple
Oats are another pantry hero, renowned for their versatility and wholesome reputation. Whether you’re using rolled oats, quick-cooking oats, or oat flour, they bring a wonderful texture and subtle nutty flavour to baked goods. Unlike refined white flour, oats offer more substance. Rolled Oats: Also known as old-fashioned oats, these retain their shape well during baking, providing a lovely chewy texture. They are fantastic in cookies, crumble toppings, baked oatmeal, and hearty muffins. Quick-Cooking Oats: These are rolled oats that have been cut into smaller pieces and steamed longer. They cook faster and result in a softer, less chewy texture than rolled oats. They can often be used interchangeably with rolled oats, though the final texture will differ slightly. Oat Flour: You can easily make your own oat flour by simply blending rolled or quick oats in a high-speed blender until finely ground. Oat flour provides a tender crumb and can replace some or all of the all-purpose flour in many recipes, adding a subtle oat flavour and extra fibre. It’s particularly good in pancakes, waffles, muffins, and quick breads. Using oats adds a rustic charm and satisfying chewiness or tenderness, depending on the form you use. They absorb moisture well, contributing to the structure of your bakes, and pair beautifully with countless flavours, especially the natural sweetness of bananas.A Match Made in Baking Heaven
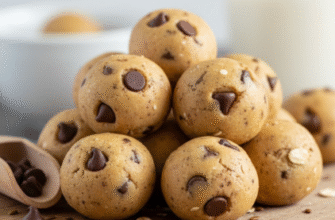
Bananas and oats aren’t just great individually; they are truly exceptional together. The natural sweetness and moisture of the banana perfectly complement the hearty texture and nutty flavour of the oats. Think about classic combinations like banana bread studded with oats or chewy banana oat cookies – they’re popular for a reason! This combination creates baked goods that are not only delicious but also more satisfying. The fibre from both ingredients helps you feel fuller for longer, potentially preventing overindulgence. It’s a pairing that feels both comforting and nourishing, hitting that sweet spot between treat and sensible choice.Tips for Successful Banana Oat Baking
Ready to start baking? Here are some tips to ensure your banana oat creations turn out perfectly:Use Very Ripe Bananas
Seriously, the spottier, the better! Brown or even black bananas might not look appealing for eating raw, but they are intensely sweet and mash easily, making them ideal for baking. Green or barely ripe bananas won’t provide enough sweetness or moisture.Mash Bananas Well (Usually)
For most recipes like muffins and breads, mash the bananas thoroughly until mostly smooth. A few small lumps are usually fine and add character. For some cookie recipes, slightly chunkier banana might be desired for texture.Choose Your Oats Wisely
Consider the final texture you want. Rolled oats for chewiness, quick oats for a softer bite, and oat flour for a tender crumb similar to traditional flour. Read your recipe carefully, as sometimes specific types are recommended for structural reasons.Reduce Added Sweeteners
Since ripe bananas add significant sweetness, start by reducing the amount of sugar, maple syrup, or honey called for in a traditional recipe. You can always taste the batter (if it doesn’t contain raw eggs) and adjust, but often you’ll need much less added sweetener than you think.Consider Fat Replacements
Mashed banana can replace some or all of the oil or butter in certain recipes, especially in muffins and quick breads. This reduces the overall fat content while maintaining moisture. Experiment by substituting half the fat with mashed banana to start.Don’t Overmix
Like most baking, especially with recipes using wheat flour alongside oats, mixing just until the ingredients are combined is key. Overmixing can develop the gluten too much, leading to tough or dense results.Boost the Flavour
Bananas and oats are a great base, but don’t be afraid to add extra flavour!- Spices: Cinnamon, nutmeg, ginger, and cardamom pair beautifully.
- Extracts: Vanilla extract is a classic, but almond or maple extract can also work well.
- Add-ins: Think chopped nuts (walnuts, pecans), seeds (chia, flax, sunflower), dried fruit (raisins, cranberries), or dark chocolate chips for extra texture and flavour.
Mindful Enjoyment: Remember that even healthier treats are best enjoyed in moderation. While using bananas and oats improves the nutritional profile, portion awareness is still important. Savour your homemade goodies as part of a balanced eating pattern.