
Content
Understanding the Impact of Freezing on Cooked Seafood
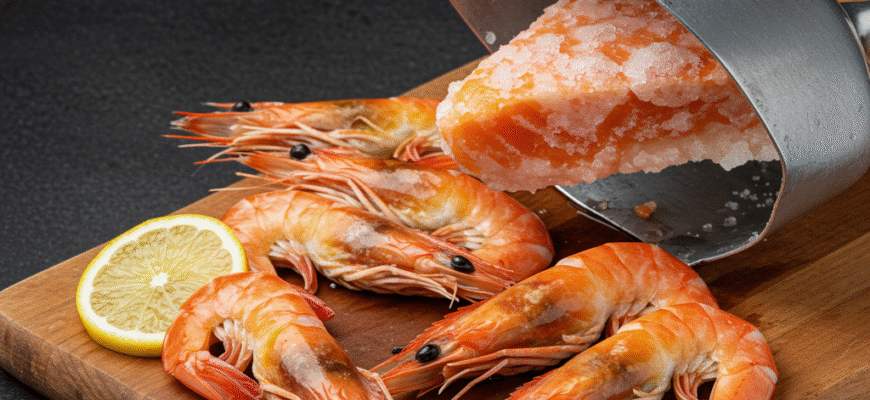
When water freezes, it expands and forms ice crystals. Inside the delicate structure of cooked seafood, these ice crystals can rupture cell walls. This process is what primarily affects the texture upon thawing. Larger ice crystals, which tend to form during slow freezing, cause more damage, often leading to a mushy or watery result. Rapid freezing creates smaller crystals, minimizing this damage. Furthermore, the type of seafood plays a role. Lean white fish like cod, haddock, or tilapia tend to freeze better texturally than oilier fish such as salmon, mackerel, or tuna, although the latter group’s fats can sometimes become rancid over long freezer storage if not protected properly from air. Shellfish like shrimp and scallops can freeze reasonably well if cooked and frozen quickly, while crab and lobster meat can become somewhat stringy or watery, especially if overcooked initially. The cooking method also influences the outcome. Seafood cooked in sauces, soups, or stews often fares better in the freezer than plainly grilled, baked, or fried items. The sauce provides a protective barrier, mitigating moisture loss and freezer burn. Fried seafood is perhaps the trickiest, as the crispy coating almost inevitably becomes soggy after freezing and thawing.The Correct Procedure for Freezing Cooked Seafood
Success lies in the details. Follow these steps carefully for the best results:Step 1: Cool It Down Quickly and Safely
Never put hot food directly into the freezer. This raises the internal temperature, potentially compromising other frozen items and encouraging bacterial growth before the food freezes solid. Let the cooked seafood cool down, but don’t leave it at room temperature for more than two hours (or one hour if the ambient temperature is high). To speed up cooling, you can place the container in an ice bath or divide large quantities into smaller, shallower containers.Step 2: Portion Control
Think about how you’ll use the seafood later. Freeze it in meal-sized portions that make sense for you or your family. This avoids thawing more than you need, as refreezing previously frozen and thawed cooked seafood is generally not recommended due to significant quality loss and potential safety concerns.Step 3: Packaging is Paramount
Air is the enemy of frozen food quality, leading to freezer burn (those dry, discoloured patches). Your goal is to create an airtight seal.- Airtight Containers: Rigid plastic containers with tight-fitting lids work well, especially for seafood in sauce. Leave a little headspace (about half an inch) as liquids can expand slightly upon freezing.
- Freezer Bags: Heavy-duty zip-top freezer bags are excellent. Place the portioned seafood inside, press out as much air as possible before sealing, and consider double-bagging for extra protection.
- Vacuum Sealing: If you have a vacuum sealer, this is the gold standard. Removing virtually all the air provides the best protection against freezer burn and extends quality storage life.
- Wrapping: For individual pieces like fish fillets or shrimp, you can wrap them tightly in plastic wrap or freezer paper first, then place them inside a freezer bag or container.
Step 4: Label and Date
Don’t rely on memory! Clearly label each package with the contents and the date it was frozen. This helps you use the oldest items first and ensures you know exactly what you’re pulling out of the freezer depths.Verified Check: Proper Cooling and Packaging are Crucial. Always cool cooked seafood rapidly before freezing to maintain safety and quality. Use airtight containers, freezer bags, or a vacuum sealer to minimize exposure to air, which prevents freezer burn and preserves texture and flavor more effectively. Remember to label everything clearly with the contents and date.
Freezer Lifespan: How Long is Too Long?
While freezing keeps food safe indefinitely from a bacterial standpoint (assuming it was safe when frozen and the freezer maintains 0°F or -18°C), quality deteriorates over time. For the best taste and texture, aim to use your frozen cooked seafood within these general guidelines:- Lean Fish (Cod, Haddock): Up to 4-6 months
- Fatty Fish (Salmon, Mackerel): Up to 2-3 months (due to fat oxidation)
- Cooked Shellfish (Shrimp, Scallops): Up to 2-3 months
- Seafood in Sauces/Stews: Up to 3-4 months
Thawing: The Gentle Approach
How you thaw is just as important as how you freeze. Never thaw cooked seafood at room temperature, as this allows bacteria to multiply rapidly in the “danger zone” (between 40°F and 140°F or 4°C and 60°C).Recommended Thawing Methods:
- Refrigerator Thawing: This is the safest and best method for preserving quality. Place the frozen package on a plate (to catch drips) in the refrigerator. Allow ample time – it can take several hours or overnight, depending on the size and density of the package.
- Cold Water Thawing: Faster than refrigerator thawing, but requires more attention. Keep the seafood in its airtight packaging (ensure it’s leak-proof) and submerge it in a bowl of cold tap water. Change the water every 30 minutes to ensure it stays cold. Small packages might thaw in an hour, while larger ones could take 2-3 hours.
- Microwave Thawing (Use with Caution): Only use the microwave’s defrost setting if you plan to use the seafood immediately after thawing. This method can easily start cooking the delicate seafood, leading to a rubbery texture. Check frequently and stop defrosting when it’s still slightly icy but pliable.
Reheating and Enjoying Your Frozen Treasures
Once thawed, use the cooked seafood within a day or two. The key to reheating is gentleness – you’re just warming it through, not cooking it again. Overheating will make it tough and dry.Reheating Ideas:
- Sauces and Soups: Add the thawed seafood during the last few minutes of reheating the sauce or soup, just long enough to warm through.
- Oven: Place thawed seafood in an oven-safe dish, perhaps with a splash of liquid (broth, water, sauce) to prevent drying, cover loosely with foil, and warm in a moderate oven (around 300-325°F or 150-160°C) until heated through.
- Microwave: Use a lower power setting and heat in short intervals, stirring or rearranging if possible, until just warm. Cover the dish to retain moisture.
- Pan: Gently warm thawed seafood in a skillet over low heat with a little oil, butter, or sauce.
Important Note on Refreezing. Avoid refreezing cooked seafood that has already been frozen and thawed. Each freeze-thaw cycle degrades the quality, significantly impacting texture and moisture content. Plan your portions carefully during the initial freezing stage to prevent needing to refreeze leftovers.
When Things Go Wrong: Recognizing Quality Loss
Despite your best efforts, sometimes frozen seafood doesn’t turn out perfectly. Signs that the quality has suffered include:- Mushy or Watery Texture: Often due to large ice crystal formation or improper thawing.
- Rubbery or Tough Texture: Can result from overcooking initially or overheating during reheating.
- Dryness: Usually caused by inadequate packaging allowing moisture loss or freezer burn.
- Off-Flavors or Odors: May indicate freezer burn or, particularly with fatty fish, fat rancidity from prolonged storage or poor packaging.


