Unlock the secret to quick, healthy, and budget-friendly meals: batch cooking Great Northern beans! These versatile legumes, known for their delicate flavour and creamy texture when cooked, are a fantastic pantry staple. Buying them dried is incredibly economical, but the cooking time can seem daunting for a weeknight. That’s where the magic of cooking a large batch comes in. By dedicating a little time upfront, you arm yourself with a ready-to-go ingredient that can transform salads, soups, stews, dips, and side dishes throughout the week (or even longer, thanks to the freezer).
Forget the mushy texture or metallic taste sometimes associated with canned beans. Home-cooked beans simply taste better, and you have complete control over the texture and sodium content. Great Northern beans are particularly wonderful because they hold their shape well while still becoming tender, making them adaptable to countless recipes. Let’s explore how to make batch cooking these white beans a simple, rewarding part of your kitchen routine.
Why Bother Batch Cooking Beans?
The benefits are numerous and genuinely make life easier. Firstly, time saving is paramount. Instead of soaking and simmering beans every time a recipe calls for them, you do it once. On busy weeknights, having cooked beans ready means you’re halfway to a hearty meal. Secondly, it’s incredibly cost-effective. A bag of dried Great Northern beans yields far more cooked beans than the equivalent cost in cans, significantly stretching your grocery budget. Thirdly, you gain control over ingredients. No added sodium unless you put it there, no preservatives, just pure bean goodness. Lastly, it promotes healthy eating by making a nutritious, fibre-rich, plant-based protein readily available for quick meal additions.
Getting Your Bean Batch Started
The process is straightforward. Here’s what you fundamentally need:
- Dried Great Northern Beans (start with 1-2 pounds for a good batch)
- A large pot, slow cooker, or electric pressure cooker (like an Instant Pot)
- Water (plenty of it!)
- Optional: Aromatics for flavour (like onion, garlic, bay leaves)
- A colander for rinsing and draining
- Containers for storage
Always start by rinsing your dried beans under cold running water. Pick through them quickly to remove any stones, debris, or broken beans that might have snuck into the bag. Quality control begins here!
The Soaking Question: To Soak or Not to Soak?
Ah, the age-old debate. Soaking dried beans before cooking serves a few purposes. It rehydrates them, which significantly shortens the cooking time. Many people also find that soaking helps make the beans more digestible by breaking down some of the complex sugars that can cause gas. If you have the time, soaking is generally recommended for Great Northern beans for the best texture and potentially easier digestion.
Soaking Methods:
- Overnight Soak: This is the easiest method. Place the rinsed beans in a large bowl or pot and cover them with plenty of cold water (at least 2-3 inches above the beans, as they will expand). Let them sit on the counter for 8-12 hours, or overnight.
- Quick Soak: Need beans faster? Place rinsed beans in a large pot, cover with water (again, 2-3 inches above), and bring to a rolling boil. Boil for 2-3 minutes, then turn off the heat, cover the pot, and let the beans sit for 1 hour.
After either soaking method, drain the soaking water and give the beans another good rinse before proceeding with cooking. If you absolutely don’t have time to soak, you can cook them from dry, but be prepared for a significantly longer cooking time, especially on the stovetop. Pressure cookers handle unsoaked beans better than other methods.
Cooking Your Great Northern Beans: Choose Your Method
Once soaked (or if you’re skipping that step), it’s time to cook! You have several reliable options:
H3>Stovetop Simmering
This is the traditional method. Place your rinsed (and possibly soaked) beans in a large, heavy-bottomed pot. Cover them generously with fresh water or broth – aim for about 2 inches of liquid above the beans. Now is a good time to add aromatics if desired: a halved onion, a few cloves of garlic (smashed or whole), a bay leaf, or even a sprig of rosemary add subtle depth. Do not add salt or acidic ingredients yet.
Bring the pot to a boil, then immediately reduce the heat to low, cover loosely (leaving the lid slightly ajar to prevent boiling over), and let the beans simmer gently. Avoid a rapid boil, which can cause the beans to break apart. Cooking time will vary widely based on bean age and whether they were soaked. Soaked beans might take 1 to 1.5 hours, while unsoaked could take 2 hours or much longer. Start checking for tenderness after about an hour for soaked beans. Add more hot water if needed to keep the beans submerged. Skim off any foam that rises to the surface during the initial cooking phase.
H3>Slow Cooker Simplicity
The slow cooker offers a mostly hands-off approach. Place rinsed (and ideally soaked) beans in the slow cooker insert. Cover with water or broth (about 1-2 inches above the beans) and add your chosen aromatics. Cook on LOW for 6-8 hours or on HIGH for 3-4 hours. Again, cooking times are approximate. Unsoaked beans will take longer, potentially needing the higher end of the time range or even more. The gentle, consistent heat is great for producing creamy beans, but check for doneness towards the end of the suggested cooking time.
H3>Pressure Cooker Speed (Instant Pot)
This is the fastest method, especially useful if you forgot to soak your beans. Place rinsed beans (soaked or unsoaked) in the pressure cooker pot. Add water or broth – a common ratio is about 4-5 cups of liquid per pound of dried beans, ensuring they are covered by at least an inch. Add aromatics. Secure the lid, set the valve to sealing, and cook on high pressure.
- Soaked Great Northern Beans: Typically require 8-12 minutes on high pressure.
- Unsoaked Great Northern Beans: Usually need 25-35 minutes on high pressure.
After the cooking time is up, allow the pressure to release naturally (Natural Pressure Release or NPR) for at least 15-20 minutes. This helps the beans finish cooking gently and retain their shape. Then, carefully perform a quick release for any remaining pressure before opening the lid.
Important Cooking Tip: Hold the salt! Avoid adding salt or acidic ingredients like tomatoes, lemon juice, or vinegar until the beans are almost completely tender. Adding them too early can interfere with the hydration process, significantly slowing down cooking and potentially resulting in beans that never quite soften properly.
Seasoning and Checking for Doneness
Once the beans are tender but not falling apart (the perfect state!), it’s time to season. Add salt to taste now. Stir gently and let them sit in the hot liquid for another 10-15 minutes off the heat; this allows them to absorb the salt evenly. How do you know they’re done? Fish out a few beans and taste them. They should be creamy and tender throughout, with no chalky or hard centre. You should be able to easily mash one against the side of the pot or between your fingers.
Cooling and Storing Your Bean Bounty
Proper cooling and storage are key to preserving your batch. Let the beans cool completely in their cooking liquid. This liquid is flavourful (often called “pot liquor”) and helps keep the beans moist and prevents the skins from drying out or cracking during storage.
- Refrigerator: Once cool, transfer the beans and enough liquid to cover them into airtight containers. They will keep well in the refrigerator for 4-5 days.
- Freezer: For longer storage, cooled beans freeze beautifully. Portion them into freezer-safe containers or heavy-duty freezer bags, ensuring they are covered with some of their cooking liquid. Leave a little headspace for expansion. They can be frozen for up to 6 months. To use, thaw them overnight in the refrigerator or gently reheat them.
Endless Ways to Use Your Batch-Cooked Beans
Now for the fun part! Having cooked Great Northern beans on hand opens up a world of possibilities:
- Salads: Add them cold or room temperature to green salads or grain bowls for a protein boost. Think Mediterranean bean salad with feta, olives, and herbs.
- Soups and Stews: Stir them into minestrone, chili blanco, vegetable soup, or any stew needing extra body and nutrition.
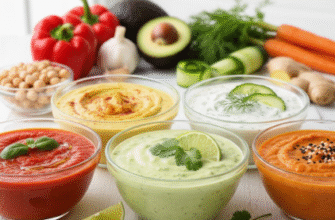
- Dips and Spreads: Blend them with garlic, lemon juice, tahini (optional), and olive oil for a white bean hummus or a simple creamy dip.
- Side Dishes: Gently reheat with olive oil, garlic, and herbs like rosemary or sage. Mash them slightly for a rustic texture.
- Tacos and Burrito Bowls: Use them as a filling or topping.
- Pasta Dishes: Toss them into pasta sauces, especially rustic Tuscan-style dishes with greens like kale or spinach.
- Mashed Beans: Mash thoroughly with seasonings as a healthy alternative to mashed potatoes or refried beans.
The delicate flavour of Great Northern beans makes them incredibly adaptable – they absorb the flavours of whatever you cook them with, making them a true team player in the kitchen.
Troubleshooting Common Bean Issues
Sometimes things don’t go perfectly. Here are a couple of common problems:
- Beans Splitting: This often happens if the beans are boiled too vigorously. Maintain a gentle simmer on the stovetop. Older beans are also more prone to splitting.
- Beans Not Softening: This can be due to several factors: very old beans (dried beans do lose quality over time), hard water (try using filtered water), or adding acidic ingredients or salt too early in the cooking process. If beans seem stubborn, ensure they have enough liquid and just keep simmering or add more pressure cooking time in small increments.
Batch cooking Great Northern beans is more than just meal prep; it’s an investment in delicious, wholesome, and convenient eating. It takes a little planning, but the payoff in time, money, and flavour is well worth the effort. Embrace the batch cook, and enjoy having these creamy, versatile beans ready whenever culinary inspiration strikes!