So, you’ve cooked up a delicious roast chicken, a big batch of chili, or maybe some tasty meatballs, and there are leftovers. Tossing them out feels wasteful, and frankly, who wouldn’t want a ready-made meal component waiting for a busy weeknight? That’s where your freezer becomes your best friend. Freezing cooked meat and poultry is a fantastic way to preserve your culinary efforts, save money, and make future meal prep a breeze. But doing it right makes all the difference between a future delicious meal and a disappointing, freezer-burned brick.
Cooling: The Crucial First Step
Before you even think about wrapping, the most critical step is cooling the cooked meat or poultry properly. Never, ever put hot or even significantly warm food directly into the freezer. Doing so raises the internal temperature of the freezer, potentially starting to thaw nearby items and creating an environment where bacteria could multiply more easily on the cooling food itself. More practically for your future meal, slow freezing caused by the initial heat can lead to large ice crystals forming within the meat, which damages the texture, making it mushy or dry upon reheating.
The goal is to cool the food down quickly. If you have a large amount, like a whole chicken or a big pot of stew, divide it into smaller, shallower portions. Spreading meat out on a tray (if appropriate) or putting stew into smaller containers increases the surface area and speeds up cooling. You can let it cool at room temperature for a short while – never more than two hours – until it’s no longer steaming profusely. Then, get it into the refrigerator to chill completely. Once it’s thoroughly cold (ideally refrigerator temperature, around 40F or 4C), it’s ready for the freezer packaging stage.
Rapid Cooling is Essential. Hot food must be cooled quickly before freezing. Divide large quantities into smaller portions and refrigerate promptly once the initial steam subsides. Never leave cooked meat at room temperature for longer than two hours before refrigerating or freezing.
Packaging Power: Your Defense Against Freezer Burn
Air is the enemy when it comes to freezing. Exposure to air causes freezer burn – those dry, greyish, leathery patches on frozen food. While generally safe to eat if you cut the affected parts away, freezer burn ruins the taste and texture. Proper packaging is all about creating an airtight barrier.
Choosing Your Materials
You have several good options:
- Heavy-Duty Freezer Bags: These are thicker than standard storage bags and designed to prevent air and moisture transfer. Squeeze out as much air as humanly possible before sealing. For things like ground meat or stew, lay the bag flat after filling and sealing to make it stackable and speed up freezing.
- Plastic Freezer Containers: Rigid containers are great for liquids, stews, and casseroles. Choose ones specifically labelled as freezer-safe, as regular plastic can become brittle and crack at low temperatures. Leave a little headspace (about half an inch) if freezing liquids, as they expand when frozen.
- Heavy-Duty Aluminum Foil: Good for wrapping solid items like roasts, chops, or chicken pieces. Crimp the edges tightly to seal. Often, it’s best used as an initial wrap, followed by a layer of plastic wrap or a freezer bag for extra protection.
- Plastic Wrap: Freezer-grade plastic wrap can be used to tightly wrap individual pieces or as a secondary layer over foil or inside a container. Cling tightly to the food surface to minimize air pockets.
- Vacuum Sealer: If you freeze food often, investing in a vacuum sealer is arguably the best method. It removes virtually all the air, providing maximum protection against freezer burn and extending the quality lifespan of your frozen items significantly.
The Double Wrap Strategy
For longer storage or for items particularly prone to drying out (like sliced roast beef or individual chicken breasts), consider double wrapping. You might wrap tightly in plastic wrap first, ensuring it clings directly to the surface, and then place the wrapped item inside a heavy-duty freezer bag, squeezing out excess air. Or wrap first in foil, then pop it in a bag. This extra layer provides insurance against small tears or imperfect seals.
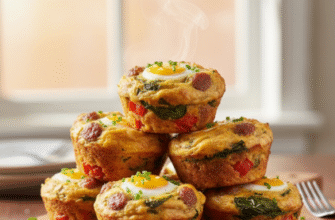
Portion Control Pays Off
Think about how you’ll use the food later. Freeze cooked ground beef in one-pound portions if that’s what your recipes usually call for. Freeze chicken breasts individually or in pairs. Freeze stew or chili in single-serving or family-sized containers. This avoids thawing a giant block of food when you only need a small amount, saving time and preventing waste, as refreezing previously frozen and thawed cooked meat is generally not recommended from a quality standpoint (and can have safety implications if not handled correctly).
Label Everything: Your Future Self Will Thank You
You might think you’ll remember what that frozen lump is and when you put it there. Trust me, you won’t. Freezer mysteries are common! Always label every package clearly and legibly with two crucial pieces of information:
- What it is: Be specific. “Chicken” isn’t as helpful as “Sliced Roast Chicken” or “Chicken Cacciatore”.
- The date it was frozen: Use a permanent marker. This helps you practice the “First-In, First-Out” (FIFO) principle, using older items before newer ones to ensure the best quality.
This simple step prevents guesswork and ensures you’re using food while it’s still at its best quality.
Freezing Performance: What Works Best?
Most cooked meats and poultry freeze quite well, but some fare better than others:
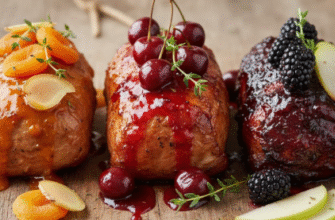
- Excellent Freezers: Cooked roasts (beef, pork, lamb), sliced turkey or chicken breast, cooked ground meats (plain or in sauces like bolognese or chili), meatloaves, meatballs, hearty stews, braised dishes, and most casseroles (though pasta texture can sometimes soften).
- Good Freezers (with minor changes): Meats in gravy or sauces generally freeze well, although very rich cream or cheese sauces can sometimes separate or become grainy upon thawing. Gentle reheating often helps recombine them. Fried coatings on items like chicken tend to lose their crispness and can become soggy after freezing and thawing – reheating in an oven or air fryer can help restore some crispness, but don’t expect perfection.
- Less Ideal: Cooked dishes with lots of mayonnaise or very delicate emulsions might not hold up well. The texture can break or become watery. It’s often better to freeze the cooked meat component separately and add dressings or delicate sauces after thawing.
Storage Duration: Quality Over Time
Freezing keeps food safe indefinitely from a bacterial standpoint, provided the freezer stays at a consistent 0F (-18C) or below. However, the quality – taste, texture, moisture – degrades over time. Here are some general guidelines for how long you can expect cooked meat and poultry to maintain good quality in the freezer:
- Casseroles, Stews, Soups, Sauces with Meat: 2 to 3 months for best quality.
- Plain Cooked Poultry or Meat (Roasts, Chops, Ground Meat): 2 to 6 months, with fattier cuts potentially degrading slightly faster. Vacuum sealing can extend this significantly.
- Cooked Dishes with Gravy/Broth: Can often last towards the longer end, 4 to 6 months, as the liquid offers some protection.
Remember, these are guidelines for peak quality. Food stored longer might be perfectly safe but may have suffered some loss in texture or flavour, especially if not packaged perfectly.
Labeling is Non-Negotiable. Always clearly label frozen packages with the contents and the date of freezing. This prevents confusion and helps you use items within their optimal quality window. Use a permanent marker for clarity.
Thawing: The Safe Transition Back
How you thaw your frozen cooked meat is just as important as how you froze it, primarily for safety and also for texture. Never thaw cooked meat at room temperature on the kitchen counter.
Recommended Thawing Methods:
- Refrigerator Thawing: This is the safest and best method for maintaining quality. Place the wrapped frozen item on a plate or in a container (to catch any drips) in the refrigerator. Allow ample time – small items might thaw overnight, while larger roasts or containers could take 24-48 hours. Once thawed, it should be used within a day or two.
- Cold Water Thawing: Faster than the fridge, but requires more attention. Keep the food in its airtight packaging (ensure it’s leak-proof!). Submerge the package in a bowl or sink full of cold tap water. Change the water every 30 minutes to ensure it stays cold. Small packages might thaw in an hour or two; larger ones will take longer. Cook or reheat immediately after thawing.
- Microwave Thawing: The fastest option, but can sometimes start to cook the edges of the meat while the center remains frozen, potentially affecting texture. Use the defrost setting on your microwave, often based on weight. Stop occasionally to separate pieces if possible. Food thawed in the microwave should be reheated immediately afterward, as some parts may have reached temperatures that encourage bacterial growth.
Reheating for Best Results
Once thawed (unless reheating directly from frozen, which is possible for some items like stews but will take longer), you want to reheat the food thoroughly and safely. The goal is to bring it back to a pleasant eating temperature without drying it out further.
- Oven/Toaster Oven: Excellent for roasts, casseroles, meatloaf, or items where you want some surface browning or crispness restored. Cover with foil initially to prevent drying, then uncover towards the end if needed. A moderate oven (around 325-350F or 160-175C) usually works well.
- Stovetop: Ideal for stews, chilis, sauces, and sliced meats in gravy. Reheat gently over medium-low heat, stirring occasionally. You might need to add a splash of broth, water, or sauce if it seems too thick.
- Microwave: Quickest for single portions or smaller amounts. Use a medium power setting and stir or rotate the food partway through heating for evenness. Cover the dish loosely to trap steam and prevent splatters.
Whatever method you choose, ensure the food is heated through completely. A food thermometer should register 165F (74C) in the thickest part for safe reheating of leftovers.
Mastering the art of freezing cooked meat and poultry opens up a world of convenience. It reduces food waste, simplifies meal planning, and ensures you always have something delicious on hand. By following these simple steps – cool quickly, package tightly, label clearly, thaw safely, and reheat thoroughly – you can confidently stock your freezer and enjoy the fruits (or meats!) of your labor weeks or even months later.