Braising, that magical cooking technique often associated with rich, hearty stews perfect for chilly evenings, might not immediately scream “healthy eating.” Visions of fatty cuts of meat swimming in heavy sauces can come to mind. But what if I told you that braising, at its core, is an incredibly versatile method that can be easily adapted to create deeply flavorful, tender, and surprisingly light dishes? It’s all about making conscious choices with your ingredients and techniques.
Forget the idea that healthy means bland or boring. Healthy braising unlocks a world of flavor concentration and satisfying textures, often using less added fat than frying or sautéing alone. It’s about harnessing the power of slow cooking and moisture to transform humble ingredients into something truly special.
Understanding the Braising Basics
Before we dive into the healthy hacks, let’s quickly recap what braising actually involves. It’s a combination cooking method that typically starts with searing the main ingredient (like meat or sturdy vegetables) in a hot pan to develop color and flavor – that lovely Maillard reaction. After searing, liquid is added – usually enough to partially submerge the main ingredient – along with aromatics like onions, carrots, celery, herbs, and spices. The pot is then covered tightly and cooked gently over low heat, either on the stovetop or in the oven, for an extended period. This low-and-slow, moist-heat environment works wonders, especially on tougher cuts of meat, breaking down connective tissue and yielding incredibly tender results while melding all the flavors together beautifully.
Why Braising Lends Itself to Healthier Cooking
Several inherent aspects of braising make it a fantastic candidate for lighter fare:
- Less Reliance on Added Fat: While searing often uses some fat, the bulk of the cooking happens in liquid. This means you don’t need continuous additions of oil or butter to prevent sticking or promote cooking, unlike pan-frying.
- Tenderizing Lean Proteins: Braising is the perfect technique for making lean, sometimes tougher, cuts of meat incredibly tender and juicy without needing fatty marbling. Think chuck roast, brisket, pork shoulder, or even chicken thighs (skin removed). The slow, moist heat breaks down collagen into gelatin, creating succulence.
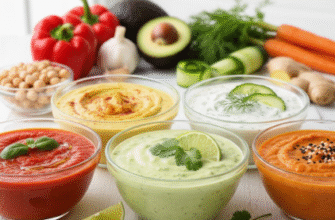
- Vegetable Powerhouse: Braising offers a fantastic opportunity to load up on vegetables. They aren’t just side notes; they often form the flavorful base of the braise and soak up all the delicious cooking liquid, adding nutrients, fiber, and bulk.
- Flavor Infusion: The long cooking time allows herbs, spices, and aromatics to deeply infuse the main ingredient and the cooking liquid, reducing the need for excessive salt or rich sauces for flavor.
Techniques for Truly Healthy Braising
Ready to transform your braising game? Here’s how to make it lighter, brighter, and packed with goodness without sacrificing taste:
Choose Your Protein Wisely
While traditional braises often feature richer cuts, you have many leaner options:
- Poultry: Skinless chicken thighs or legs are fantastic; they stay moist and flavorful. Even skinless chicken breasts can work if braised carefully for a shorter time. Turkey legs or thighs are also excellent choices.
- Lean Beef & Pork: Look for cuts like beef chuck eye, bottom round, sirloin tip, or pork loin or shoulder (trim visible fat well). The braising process will tenderize these leaner options beautifully.
- Fish & Seafood: Yes, you can braise fish! Firm-fleshed fish like cod, halibut, or monkfish work well. Shellfish like mussels or clams can be added towards the end of the cooking time. Braising time will be significantly shorter.
- Plant-Based Proteins: Don’t forget legumes and vegetables! Hearty beans (like chickpeas or cannellini), lentils, firm tofu, tempeh, mushrooms (especially portobello or shiitake), eggplant, and root vegetables braise wonderfully, absorbing all the surrounding flavors.
Minimize and Manage Fats
Fat adds flavor, but a little goes a long way in a healthy braise.
- Trim Aggressively: Before searing, trim away any large, visible pieces of fat from your meat or remove the skin from poultry.
- Sear Smartly: Use just enough healthy oil (like olive or avocado oil) to prevent sticking during the searing process. A good non-stick or well-seasoned cast iron pan helps. You don’t need to shallow-fry the item.
- Degrease: This is crucial! After searing meat, you might pour off excess rendered fat from the pan before adding your aromatics and liquid. Furthermore, once the braise is finished, let it sit for a few minutes. Fat will rise to the surface, allowing you to easily skim it off with a spoon before serving. Chilling the braise overnight makes fat removal even easier as it solidifies.
Load Up on Vegetables and Aromatics
Vegetables are your secret weapon for flavor and nutrition.
- The Flavor Base: Go beyond the standard mirepoix (onion, carrot, celery). Add leeks, garlic, fennel, bell peppers, or parsnips to build a complex flavor foundation. Sauté these after searing the protein.
- Bulk It Up: Add heartier vegetables partway through cooking so they become tender but not mushy. Think potatoes, sweet potatoes, winter squash, turnips, or sturdy greens like kale or collards added towards the end.
- Think Beyond Roots: Mushrooms add deep umami flavor. Tomatoes (canned or fresh) contribute acidity and body.
Select Flavorful, Lighter Liquids
The braising liquid defines the dish’s character. Choose wisely for a healthy profile.
- Broth is Best: Use low-sodium chicken, beef, or vegetable broth as your primary liquid.
- Water Works: Don’t underestimate plain water, especially if you have a strong base of aromatics and quality main ingredients.
- Wine/Vinegar for Acidity: A splash of wine (which cooks off its alcohol) or vinegar (like red wine, cider, or balsamic) adds brightness and helps tenderize. Use sparingly for balance.
- Juices: Unsweetened tomato juice, vegetable juice, or even a little fruit juice (like apple or orange for pork or poultry) can add unique flavor notes.
- Avoid Heavy Creams: Skip the heavy cream or roux-thickened sauces. If you desire creaminess, consider stirring in a touch of plain yogurt, light coconut milk, or a puree of some of the cooked vegetables at the very end, off the heat.
Verified Technique: Low, slow cooking in moist heat, the hallmark of braising, excels at breaking down collagen (connective tissue) in leaner or tougher cuts of protein into luscious gelatin. This process naturally tenderizes the food, creating a succulent texture. This means you can achieve melt-in-your-mouth results without relying solely on high-fat content for tenderness.
Master Seasoning Sans Salt Overload
Build flavor layers without relying heavily on salt.
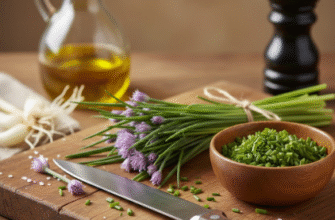
- Herbs & Spices: Be generous! Bay leaves, thyme, rosemary, oregano, smoked paprika, cumin, coriander, peppercorns – these add immense flavor. Add hardier herbs early, and delicate ones (like parsley, cilantro, dill) at the end.
- Umami Boosters: Tomato paste, mushrooms (especially dried, rehydrated ones), or a dash of low-sodium soy sauce or tamari can add depth.
- Taste and Adjust Late: Because the liquid reduces during braising, flavors concentrate. Hold off on final salt adjustments until the end of cooking to avoid over-salting.
A Basic Healthy Braising Blueprint
Here’s a general guide to putting these techniques into practice:
- Prep: Trim fat from protein. Pat protein dry for better searing. Chop your aromatics (onions, garlic, carrots, celery) and any hearty vegetables.
- Sear: Heat a small amount of oil in a heavy-bottomed pot or Dutch oven over medium-high heat. Sear the protein on all sides until nicely browned. Remove protein and set aside.
- Sauté Aromatics: If needed, pour off excess fat. Add onions, carrots, and celery to the pot and cook until softened, about 5-7 minutes. Add garlic and any spices (like paprika or cumin) and cook for another minute until fragrant.
- Deglaze: Pour in a splash of your chosen liquid (broth, water, wine) and scrape up any browned bits stuck to the bottom of the pot – this is pure flavor!
- Combine & Simmer: Return the protein to the pot. Add enough braising liquid (low-sodium broth, water) to come about halfway up the sides of the main ingredient. Add bay leaves or sturdy herbs. Bring to a simmer.
- Cook Low & Slow: Cover the pot tightly. Reduce heat to low and simmer gently on the stovetop, or transfer to a preheated oven (typically around 300-325°F or 150-160°C). Cooking time varies greatly depending on the ingredient (from 30 minutes for fish to 3+ hours for large roasts). Add other vegetables partway through as appropriate for their cooking times.
- Finish: Once the protein is fork-tender, remove it from the pot and let it rest. Skim any visible fat from the surface of the braising liquid. Taste the liquid and adjust seasoning (salt, pepper, maybe a squeeze of lemon juice or fresh herbs). If desired, you can simmer the liquid uncovered briefly to reduce and concentrate it slightly. Serve the protein with the sauce and vegetables.
Troubleshooting Tips
- Bland Flavor? Did you sear properly? Did you use enough aromatics, herbs, and spices? Did you deglaze? Try adding a splash of vinegar, lemon juice, or fresh herbs at the end for brightness. Reducing the sauce slightly can also concentrate flavor.
- Tough Meat? It probably needs more cooking time at a low, gentle temperature. Ensure the pot is tightly covered to keep moisture in. Don’t let the liquid boil rapidly; it should be a gentle simmer.
- Sauce Too Thin? Remove the lid for the last 20-30 minutes of cooking to allow evaporation. Alternatively, remove the cooked protein and vegetables, then simmer the sauce over medium heat until reduced to your liking. You can also mash some of the cooked vegetables into the sauce or whisk in a slurry of cornstarch and cold water (use sparingly).
Embrace the Braise
Healthy braising isn’t about deprivation; it’s about smart choices and celebrating flavor. By choosing lean proteins, loading up on vegetables, using flavorful low-fat liquids, and managing added fats, you can create deeply satisfying, nutritious meals. It’s a technique that rewards patience with incredible texture and taste. So, dust off that Dutch oven and start experimenting – a world of healthy, delicious braised dishes awaits!