Tossing out those onion skins, carrot tops, and celery butts feels like such a waste, doesn’t it? It piles up surprisingly quickly, contributing to household food waste. But what if those scraps weren’t really waste at all? With a little creativity, those bits and pieces destined for the bin can be transformed into delicious additions to your meals, helpful garden aids, or even new plants. It’s easier than you think to give these humble remnants a second life, saving you money and reducing your environmental footprint in the process. Let’s ditch the guilt and explore some simple, practical ways to make the most of your vegetable scraps.
Homemade Vegetable Broth: Liquid Gold from Scraps
This is perhaps the most classic and rewarding way to use up vegetable odds and ends. Instead of buying cartons of stock, you can create your own flavourful base for soups, stews, sauces, and cooking grains. It’s incredibly simple and utilises scraps you’d definitely otherwise throw away.
What Scraps Work Best?
Think aromatic vegetables! Keep a large freezer bag or container dedicated to broth scraps. Toss these in as you prep meals:
- Onion ends and skins: Especially yellow or red onion skins, which add a beautiful golden or reddish hue to your broth. Just make sure they’re clean.
- Carrot peels and ends: Wash them well first, especially if not organic.
- Celery ends and leaves: The leaves are packed with flavour.
- Leek tops (the dark green parts): Wash thoroughly as they trap grit.
- Garlic skins and ends: Add a subtle garlic flavour.
- Mushroom stems: Contribute a lovely earthy depth (umami).
- Parsley and other herb stems: Don’t toss those woody stems from parsley, cilantro, or dill!
- Bell pepper cores and ends (seeds removed if you prefer): Use sparingly unless you want a strong pepper flavour.
- Fennel fronds and stalks: Add a delicate anise note.
- Corn cobs (after kernels are removed): Impart a surprising sweetness.
Scraps to Use Cautiously or Avoid
Some scraps can overpower your broth or make it bitter or cloudy:
- Cruciferous vegetables (broccoli, cauliflower, cabbage, Brussels sprouts stems/leaves): Use very sparingly or omit entirely, as they can make the broth taste sulphurous or bitter, especially when cooked for a long time.
- Potato peels: Can make the broth starchy and cloudy. Also, avoid any green peels due to solanine.
- Beet scraps: Will turn your broth bright pink/red and add a very earthy flavour, which might not be desirable for all uses.
- Anything moldy or spoiled: This should be obvious, but only use fresh, clean scraps.
Making the Broth
Once your freezer bag is full (usually takes a few weeks depending on your cooking habits), empty the frozen scraps into a large stockpot. You don’t even need to thaw them. Cover generously with cold water – about an inch or two above the scraps. You can add a bay leaf, a few whole peppercorns, or even a splash of apple cider vinegar (which supposedly helps extract minerals, though flavour is the main goal here). Bring the pot to a boil, then immediately reduce the heat to low, partially cover, and let it simmer gently. How long? Anywhere from 1 to 3 hours is common. The longer it simmers, the deeper the flavour. Avoid boiling it vigorously, as this can make the broth cloudy. Once done, let it cool slightly, then strain it through a fine-mesh sieve, pressing gently on the solids to extract maximum liquid (but not too hard, or you might get cloudiness). Discard the spent solids – they’ve given their all! Now you can compost them. Let the broth cool completely before storing it in containers in the fridge (for up to 4-5 days) or freezer (for several months).
Be mindful when selecting scraps for broth or other uses. Avoid using any parts of vegetables that show signs of mould or spoilage. Additionally, potato peels, especially if they have any green tinge, should not be consumed as they contain solanine, a natural toxin. While clean brown peels can be used by some for things like crisps, they can make broth starchy.
Regrow Vegetables on Your Windowsill
Did you know many common vegetables can actually regrow from the parts you usually discard? It’s a fun project, especially with kids, and gives you bonus harvests of fresh greens or herbs. It won’t replace your grocery shopping, but it’s a neat trick.
Easy Veggies to Regrow:
- Green Onions/Scallions: This is the easiest one! Simply place the white root ends (with about an inch of green attached) in a small glass of water, ensuring the roots are submerged but the tops aren’t. Place it on a sunny windowsill. Change the water every couple of days. You’ll see new green shoots emerge within days! Snip off what you need, and they’ll often continue to grow back multiple times.
- Celery: Cut off the base of the celery stalk (about 2 inches). Place it cut-side up in a shallow dish of warm water, ensuring the base is submerged. Keep it in a bright spot. Change the water regularly. After about a week, you should see small yellow leaves emerging from the center. Once roots and more substantial leaves appear, you can transplant it into soil for a larger (though often thinner) celery plant.
- Romaine Lettuce, Bok Choy, Cabbage: Similar to celery, use the base (about 1-2 inches). Place it in a shallow bowl of water (about half an inch) near sunlight. Change the water frequently. New leaves will sprout from the center. You can harvest these small leaves for salads or transplant to soil once roots develop for potentially larger growth.
- Leeks: Use the root end, similar to green onions. Place in water and watch the greens grow back.
- Garlic Greens: If a garlic clove starts sprouting a green shoot, plant the clove (pointy side up) in a small pot with soil, leaving the tip exposed. Water it and place it in sunlight. You can snip the green shoots (garlic scapes/greens) to use like chives – they have a mild garlic flavour. The clove itself won’t typically regrow a full head this way, but the greens are useful.
- Carrot Tops: You won’t regrow a carrot root, but you can grow the leafy greens! Cut about an inch off the top of the carrot where the greens sprout. Place it cut-side down in a shallow dish of water. Feathery greens will grow, which are edible and can be used in salads, pesto, or as a garnish (though some find them slightly bitter).
- Herb Stems (Basil, Mint, Cilantro): Some sturdy herb stems can root in water. Place stems with a few leaves attached in a glass of water on a windowsill. Change the water regularly. If roots develop, you can plant them in soil.
Remember, regrowing primarily works for leafy tops or shoots. You won’t get a new root vegetable like a potato or carrot this way, but you can get bonus greens and herbs!
Flavour Boosters: Infused Oils and Vinegars
Don’t underestimate the power of scraps to infuse everyday staples like oil and vinegar with exciting new flavours. It’s a simple way to add a gourmet touch to your cooking.
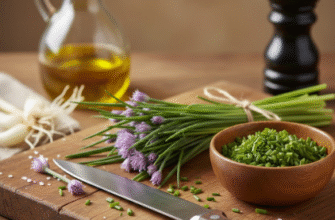
Herb Stems and Citrus Peels
Those woody stems from parsley, cilantro, rosemary, or thyme that you might normally compost? They still hold plenty of aromatic oils. Clean citrus peels (from lemons, oranges, limes – preferably organic and well-washed) are also fantastic flavour bombs.
Method for Oil: Gently warm a neutral oil like olive oil or sunflower oil in a saucepan over low heat (do not let it simmer or smoke). Add your clean, dry herb stems or citrus peels. Let them steep in the warm oil off the heat for at least an hour, or even longer for a stronger flavour. Strain the oil through a fine sieve or cheesecloth into a clean bottle. Store in the refrigerator and use within a week or two for dressings, marinades, or drizzling.
Method for Vinegar: Simply place clean herb stems or citrus peels into a clean jar and cover with white wine vinegar or apple cider vinegar. Seal the jar and let it sit in a cool, dark place for about one to two weeks, shaking it gently every couple of days. Taste it periodically – once it reaches the desired flavour intensity, strain out the solids. Use in vinaigrettes or anywhere you’d use regular vinegar.
Chili Tops and Garlic Ends
The tops of chili peppers (where the stem attaches) often get sliced off and discarded, but they still carry heat. The tough root ends of garlic cloves also have flavour. Add these (clean and dry) to your oil or vinegar infusions for a spicy or garlicky kick.
Beyond the Kitchen: Compost and Other Uses
Of course, the ultimate way to recycle scraps you truly can’t eat is composting. Whether you have a large outdoor bin, a worm farm, or use a local collection service, composting turns vegetable waste back into nutrient-rich food for your garden or houseplants. It completes the natural cycle.
Some other niche ideas include:
- Natural Dyes: Onion skins (yellow/orange/brown), beet scraps (pink/red), and spinach (green) can be simmered in water to create natural dyes for fabrics or Easter eggs.
- Potpourri Components: Dried citrus peels can add a lovely scent to homemade potpourri mixes.
- Cleaning Power: Lemon peels can be used to help clean greasy surfaces or deodorise your garbage disposal (run them through with cold water).
Get Creative: Unexpected Culinary Delights
Think outside the broth pot! Many scraps can be turned into unique and tasty snacks or dish components.
Potato Peel Crisps
Don’t throw away those potato peels (as long as they’re clean and have no green spots!). Toss them with a little oil, salt, pepper, and maybe some paprika or garlic powder. Spread them in a single layer on a baking sheet and bake in a hot oven (around 400°F or 200°C) until crispy and golden brown, flipping halfway through. Keep a close eye on them as they can burn quickly. They make a fantastic, crunchy snack or garnish.
Broccoli Stalk Slaw or Stir-fries
The thick broccoli stalk is often discarded, but it’s perfectly edible and nutritious. Peel away the tough outer layer with a vegetable peeler, then slice or julienne the tender interior. It’s great raw in slaws (it has a lovely crunch) or added to stir-fries, where it cooks up nicely.
Carrot Top Pesto
Those leafy green carrot tops you grew on your windowsill (or saved from a bunch of carrots)? Wash them well and substitute them for some or all of the basil in your favourite pesto recipe. Combine with garlic, pine nuts (or walnuts/sunflower seeds), Parmesan cheese (optional), olive oil, salt, and pepper in a food processor. It has a slightly earthy, parsley-like flavour.
Candied Citrus Peels
Turn lemon, orange, or grapefruit peels into a sweet treat. Scrape away most of the white pith (which is bitter), cut the peel into strips, and boil them in water a couple of times (changing the water) to soften and reduce bitterness. Then, simmer them in a simple syrup (equal parts sugar and water) until translucent. Finally, let them dry on a rack and toss them in sugar. They’re great for baking, garnishes, or snacking.
Vegetable Powder Seasoning
This requires a dehydrator or a very low oven setting. Collect clean scraps like onion skins, carrot peels, celery leaves, mushroom stems, and bell pepper bits. Dehydrate them until completely dry and brittle. Once cool, grind them into a fine powder using a spice grinder or high-powered blender. Store this vegetable powder in an airtight container and use it as a flavour enhancer or salt substitute in soups, sauces, or sprinkled over dishes.
Using vegetable scraps isn’t about deprivation; it’s about resourcefulness and discovering hidden flavours and possibilities right in your own kitchen. It encourages a more mindful approach to cooking and consumption. Start small – maybe just save scraps for broth this week, or try regrowing some green onions. You’ll likely find it’s not only easy but also surprisingly satisfying to turn potential waste into something wonderful.