Venturing into the world of baking with coconut flour can feel a bit like exploring uncharted territory. It’s not your typical all-purpose flour, and treating it as such is a recipe for, well, not-so-great results. But fear not! Once you understand its unique personality, coconut flour can become a fantastic staple in your gluten-free or grain-free kitchen, adding a subtle sweetness and a lovely texture to your baked goods.
So, what makes coconut flour so different? It’s made from dried, ground coconut meat left over after producing coconut milk. This process results in a flour that’s incredibly high in fiber and quite low in carbohydrates compared to traditional grain flours. It also boasts a decent amount of protein and healthy fats. But the most crucial characteristic for baking is its extraordinary absorbency. Think of it like a super sponge.
The Golden Rules of Coconut Flour Baking
Forget everything you know about one-to-one substitutions. You absolutely cannot swap coconut flour directly for wheat flour or even most other gluten-free flours in a standard recipe. Doing so will likely result in a dry, crumbly, and frankly disappointing outcome. Here’s the lowdown on navigating its quirks:
Liquid Logic: Hydration is Key
Because coconut flour soaks up liquid like nobody’s business, you’ll need significantly more wet ingredients than you’re used to. This doesn’t just mean water or milk; it includes eggs, oil, yogurt, applesauce – anything that adds moisture. A general starting point is often cited as using roughly the same amount of liquid (by weight or volume) as the coconut flour itself, but this is highly variable depending on the recipe.
You’ll often find recipes specifically developed for coconut flour call for a surprisingly large number of eggs. Eggs do double duty: they provide essential moisture and act as a binder, helping to replicate the structure that gluten provides in traditional baking. Without enough eggs, your coconut flour creation might fall apart.
Important Hydration Note: Coconut flour is exceptionally absorbent. You typically only need about 1/4 to 1/3 cup of coconut flour to replace 1 cup of all-purpose flour. Consequently, you must significantly increase the liquid and egg content in the recipe to avoid dry, crumbly results. Always let the batter sit for 5-10 minutes after mixing to allow the flour to fully hydrate before assessing the consistency.
The Egg Factor: Structure and Moisture
As mentioned, eggs are coconut flour’s best friend. They provide binding, leavening (especially when whipped), and much-needed moisture. Don’t be alarmed if a coconut flour pancake recipe calls for 4-6 eggs for just 1/4 cup of flour. It seems excessive, but it’s often necessary for the right texture and structure. If you need an egg-free option, things get trickier. You’ll need to experiment with binders like psyllium husk, flax eggs, or chia eggs, along with additional liquid, but achieving the same texture can be challenging.
Mixing Matters: Avoid Overworking
Unlike wheat flour, where developing gluten is sometimes desirable (hello, chewy bread!), there’s no gluten in coconut flour. Overmixing isn’t usually a problem in terms of toughness. However, because it absorbs so much liquid, it’s good practice to mix until just combined. Letting the batter rest for 5-10 minutes before baking is also crucial. This allows the coconut flour to fully absorb the liquid, giving you a better sense of the final batter consistency. You might find it thickens considerably during this rest period.
Getting Started: Simple Swaps and Recipe Finds
The easiest way to begin is by using recipes specifically designed for coconut flour. Talented recipe developers have already done the trial-and-error for you! Search online for “coconut flour muffins,” “coconut flour pancakes,” or “coconut flour cookies,” and you’ll find plenty of options tailored to its unique properties.
If you’re feeling adventurous and want to adapt a recipe, start small. Try substituting only a small portion (maybe 20-25%) of the total flour called for with coconut flour. Remember to also increase the liquids proportionally. For every 1/4 cup of coconut flour you add, you might need to add an extra egg or a few tablespoons of liquid fat or other liquid. This requires experimentation and careful observation.
Cookies, Cakes, and Breads: Texture Tales
How does coconut flour perform in different types of baked goods?
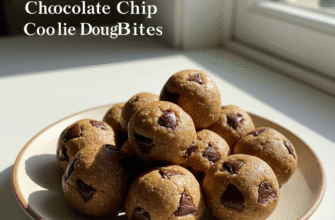
- Cookies: Coconut flour can make wonderfully soft, almost cakey cookies. Achieving a crispy cookie is more challenging due to the high moisture content required. It pairs beautifully with flavors like chocolate, vanilla, and of course, more coconut.
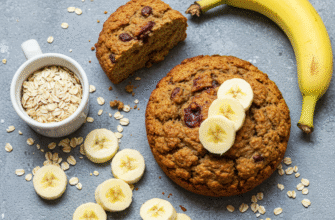
- Cakes and Muffins: This is where coconut flour often shines. It creates tender, moist crumbs. Because it needs so much liquid and eggs, the resulting cakes and muffins are often rich and satisfying. Be mindful of baking times; coconut flour items might brown faster due to the natural sugars.
- Pancakes and Waffles: Expect denser, heartier pancakes than traditional fluffy ones. The high egg content makes them quite filling. Ensure your batter isn’t too thick, or they might be dry inside.
- Breads: Creating a light, airy loaf like traditional sandwich bread with 100% coconut flour is very difficult due to the lack of gluten. Quick breads and denser loaves are more achievable. It often works best when combined with other gluten-free flours like almond or tapioca starch for better structure.
Flavor Profile and Pairings
Coconut flour does have a mild, subtly sweet coconut flavor. While some people find it barely noticeable in the finished product, especially when strong flavors like chocolate or spices are involved, others are more sensitive to it. If you’re not a fan of coconut, this might not be the flour for you, although the taste is much less pronounced than shredded coconut.
It pairs naturally well with:
- Chocolate
- Vanilla
- Berries (blueberries, raspberries)
- Banana
- Citrus (lemon, orange, lime)
- Spices (cinnamon, nutmeg, cardamom)
- Nuts and seeds
Verified Benefit: Coconut flour is naturally gluten-free and grain-free, making it an excellent choice for individuals with celiac disease, gluten sensitivity, or those following paleo or low-carb diets. Its high fiber content can also contribute to digestive health and satiety. Remember to always purchase certified gluten-free coconut flour if cross-contamination is a concern.
Troubleshooting Common Coconut Flour Issues
Encountering a few bumps is normal when starting out. Here are some common problems and solutions:
Problem: Too Dry or Crumbly
Solution: Likely not enough liquid or eggs. Next time, increase the wet ingredients. For the current batch (if it’s a batter), try adding another egg or a tablespoon or two of milk, oil, or applesauce. Remember the resting period – let it sit!
Problem: Eggy Taste
Solution: While eggs are necessary, too many can impart a noticeable flavor. Ensure you’re using flavorful additions like vanilla extract, spices, cocoa powder, or fruit to mask it. Using good quality, fresh eggs also helps. Some recipes might work with slightly fewer eggs if you compensate with other liquids or binders.
Problem: Gummy or Dense Texture
Solution: This could be from underbaking or potentially too much liquid without enough structure. Ensure your oven temperature is accurate and bake thoroughly – a toothpick test is essential. Sometimes, combining coconut flour with a lighter flour like almond flour can improve texture in certain recipes.
Problem: Baked Goods Too Dark on Top
Solution: Coconut flour contains natural sugars that can cause quicker browning. If the outside is browning too fast before the inside is cooked, try lowering the oven temperature slightly (by 10-15°C or 25°F) and potentially increasing the baking time. You can also loosely tent the item with aluminum foil during the latter part of baking.
Baking with coconut flour is a journey of discovery. It requires adjusting your mindset and techniques, but the rewards – delicious, satisfying, and often healthier baked treats – are well worth the effort. Embrace the learning curve, start with dedicated recipes, pay close attention to moisture levels, and don’t be afraid to experiment. Happy baking!

