Dipping your toes into the world of gluten-free baking often starts with a readily available ingredient: rice flour. It seems straightforward, right? Just swap it in for regular flour? Well, not quite. Baking with rice flour opens up a new set of rules and techniques, but mastering them unlocks a delicious range of possibilities for those avoiding gluten. It’s different, yes, but absolutely achievable and rewarding once you understand its unique personality.
Unlike wheat flour, rice flour contains no gluten. Gluten is the protein network that gives traditional baked goods their structure, elasticity, and chew. Without it, things made purely with rice flour can turn out crumbly, dense, dry, or even gritty. But don’t let that discourage you! Think of rice flour not as a direct substitute, but as a foundational element in a gluten-free baking toolkit.
Understanding the Different Types of Rice Flour
Not all rice flour is created equal. Walking down the baking aisle (or the international foods aisle), you’ll likely encounter a few varieties, each with its own characteristics:
- White Rice Flour: Milled from polished white rice, this is perhaps the most common type. It has a very neutral flavour and a light colour, making it versatile. However, depending on the grind, it can sometimes lend a slightly gritty texture if used alone or in large quantities. It works well in blends for cakes, cookies, and as a thickening agent for sauces.
- Brown Rice Flour: Made from whole grain brown rice (bran included), this flour has a nuttier, earthier flavour and a slightly heavier texture than white rice flour. It also brings a bit more nutritional value from the bran. Because of its stronger flavour and denser nature, it’s often preferred in heartier baked goods like muffins, quick breads, and some rustic bread recipes. It absorbs more liquid than white rice flour.
- Sweet Rice Flour (Glutinous Rice Flour or Mochiko): This is a game-changer! Despite the name “glutinous,” it contains no gluten. It’s milled from short-grain sticky rice (the kind used for mochi). This flour is prized for its binding properties and its ability to create a chewy, moist texture. It’s fantastic in blends to improve the texture and elasticity of gluten-free goods, preventing them from being too crumbly. It’s essential for Japanese mochi and wonderful in certain cookies and doughs.
The Challenges (and How to Overcome Them)
The primary challenge, as mentioned, is the lack of gluten. This means we need to manually add back structure and binding that wheat flour provides naturally. Relying solely on rice flour, especially white or brown, often leads to results that are:
- Crumbly: Without gluten’s web, things just fall apart easily.
- Dense: Lack of elasticity means doughs and batters don’t trap air as effectively, leading to heavier results.
- Dry: Rice flour can absorb a lot of moisture, sometimes sucking it all up during baking, leaving the final product dry.
- Gritty: Depending on the mill, some rice flours can have a noticeable sandy texture.
Tip 1: Blend, Blend, Blend!
This is probably the most crucial tip for successful gluten-free baking with rice flour. Rarely will you use just rice flour on its own. Blending it with other gluten-free flours and starches creates a more balanced profile, mimicking the properties of wheat flour more closely. Common blending partners include:
- Starches (Tapioca Starch, Potato Starch, Cornstarch): These add lightness, help with browning, and contribute to binding. Tapioca starch, in particular, adds a pleasant chewiness.
- Other Gluten-Free Flours (Sorghum, Millet, Buckwheat, Almond, Coconut): These add flavour, structure, and varying nutritional profiles. Almond flour adds moisture and richness, while sorghum offers a mild, slightly sweet flavour.
- Sweet Rice Flour: As noted earlier, its binding power is invaluable for improving texture and reducing crumbliness.
Many successful gluten-free recipes use a carefully balanced mix, often combining a primary flour (like rice), a secondary flour for flavour/texture, and a starch for lightness and binding.
Tip 2: Introduce Binders
Since there’s no gluten, you need something else to hold everything together and provide some elasticity. This is where binders come in:
- Xanthan Gum: A common and effective binder derived from fermented sugar. It helps mimic gluten’s binding and thickening properties. You only need a small amount (typically 1/4 to 1 teaspoon per cup of flour blend, depending on the recipe). Too much can make things gummy.
- Guar Gum: Similar to xanthan gum, derived from guar beans. Some people prefer it or tolerate it better than xanthan gum. Usage amounts are similar.
- Psyllium Husk: Made from the husks of Plantago ovata seeds, psyllium absorbs a lot of water and creates a gel, which provides excellent structure and moisture, especially in bread recipes. It can be used as whole husks or ground powder.
- Ground Flaxseed or Chia Seeds (as an ‘egg’): Mixing ground flax or chia with water creates a gel that can help bind ingredients, especially in vegan baking or recipes like cookies and muffins.
Never assume you can swap wheat flour for rice flour directly in a standard recipe. Rice flour lacks gluten and absorbs liquid differently, leading to unpredictable and often disappointing results. Always seek out recipes specifically developed for gluten-free flours or be prepared to experiment significantly with flour blends, binders, and liquids. Ignoring this often results in crumbly, dense, or dry baked goods.
Tip 3: Mind the Moisture
Rice flours, particularly brown rice flour, can be quite thirsty. You might find that gluten-free recipes call for more liquid (milk, water, oil, eggs) than their traditional counterparts. Don’t be afraid if a batter seems slightly thinner than you’re used to; the rice flour will absorb moisture during baking.
Let it Rest: Allowing your batter or dough (especially those for muffins, pancakes, or quick breads) to rest for 15-30 minutes before baking can make a significant difference. This gives the rice flour time to fully hydrate, which can improve the texture and reduce any potential grittiness.
Tip 4: Manage Texture and Flavour
To combat potential grittiness, ensure you’re using a finely milled rice flour if possible. Sifting your flour blend can also help incorporate air and break up clumps. Using brown rice flour will add a nutty taste, which can be lovely in some recipes but might overpower delicate flavours. White rice flour is more neutral. Using binders and sufficient fat (like butter, oil, or coconut milk) also contributes significantly to a tender crumb and prevents dryness.
Tip 5: Adjust Baking Times and Temperatures
Gluten-free baked goods sometimes benefit from slightly lower baking temperatures and potentially longer baking times. This allows the centre to cook through fully before the edges become too brown or dry. Keep a close eye on your creations, as oven temperatures and specific recipes vary. Use visual cues (golden brown colour, set centre) and the toothpick test (inserting a toothpick into the centre – it should come out clean or with moist crumbs attached, not wet batter) to check for doneness.
Getting Started: Simple Rice Flour Adventures
If you’re new to baking with rice flour, start simple. Don’t jump straight into complex sourdough or delicate pastries. Good starting points include:
- Pancakes or Waffles: These are quite forgiving. A blend using white or brown rice flour, tapioca starch, and a bit of sweet rice flour often works well.
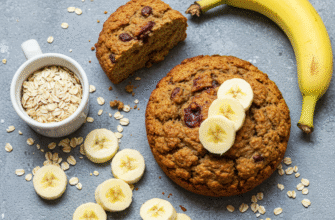
- Muffins and Quick Breads: Look for recipes specifically designed to be gluten-free. They will have already accounted for the flour blends and binders needed.
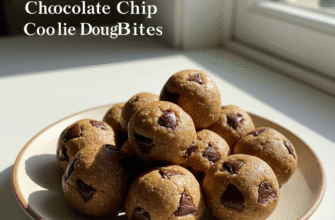
- Cookies: Simple cookies like shortbread can be adapted more easily, as a slightly crumbly texture might even be desirable. Again, seek out GF recipes first.
- Crumbles and Crisps Toppings: Rice flour can work well in combination with oats (use certified GF oats if needed), butter, and sugar for fruit crumble toppings.
Embrace the Experiment
Baking with rice flour is a journey. There will be trials, errors, and maybe a few hockey-puck-like muffins along the way. That’s okay! The key is to understand the properties of the flour, the importance of blending and binding, and the need for proper hydration. Pay attention to how different blends behave, take notes on what works, and don’t be afraid to tweak recipes (methodically!). With a bit of patience and practice, you’ll find that rice flour can be a fantastic staple in your gluten-free baking pantry, helping you create delicious treats everyone can enjoy.

