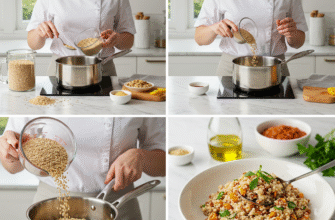
Unlock a world of convenience and deliciousness by embracing the simple art of batch cooking adzuki beans. These little red gems, often associated with sweet Asian desserts, are surprisingly versatile and incredibly nutritious. Preparing a large batch ahead of time means you have a ready-to-go ingredient for countless meals throughout the week, saving you precious time on busy evenings and encouraging healthier eating habits. Forget the hassle of cooking beans from scratch every time a recipe calls for them; a little upfront effort yields significant rewards.
Getting to Know Adzuki Beans
Adzuki beans (sometimes spelled azuki) are small, reddish-brown legumes with a distinctive white ridge along one side. Cultivated in East Asia for centuries, they possess a relatively low-fat profile compared to other beans and boast a slightly sweet, nutty flavour. This inherent sweetness makes them a natural fit for desserts like Japanese anko (sweet red bean paste), but their earthy undertones also complement savory dishes beautifully. They cook up creamy yet tend to hold their shape well, making them texturally pleasing in various preparations.
Why Bother Batch Cooking?
The advantages of cooking a big pot of adzuki beans at once are numerous. Time-saving is the most obvious benefit. Cooking dried beans takes time, often an hour or more, even after soaking. Doing it once for the week (or even longer if you freeze them) is far more efficient than repeating the process multiple times. It’s also cost-effective; dried beans are significantly cheaper than their canned counterparts, and you control the ingredients, avoiding added sodium or preservatives often found in cans.
Batch cooking supports meal prepping efforts perfectly. Having cooked adzuki beans on hand opens up quick meal possibilities. Toss them into salads, blend them into dips, add them to soups, or mix them with grains for a hearty bowl. This readily available protein and fiber source makes putting together a balanced meal much faster. Finally, it encourages culinary exploration. With beans ready to go, you might be more inclined to try recipes you’d otherwise skip due to the bean preparation time.
Your Adzuki Bean Cooking Toolkit
You don’t need fancy equipment, but having the right tools makes the process smoother. Here’s a basic list:
- Dried adzuki beans (start with 1-2 cups dried, which yields roughly 3-6 cups cooked)
- A large bowl (for soaking, if you choose to)
- A colander or fine-mesh sieve (for rinsing)
- A large, heavy-bottomed pot with a lid, a pressure cooker (like an Instant Pot), or a slow cooker
- Water (plenty of it!)
- Optional: A strip of kombu (dried kelp) for flavour and potentially improved digestibility
- Airtight containers for storage
The Great Soaking Debate: To Soak or Not to Soak?
Soaking dried beans before cooking is a long-standing practice, and for good reason, though it’s not strictly mandatory for adzuki beans like it is for larger beans.
Pros of Soaking: Soaking hydrates the beans, which typically leads to a shorter cooking time and can potentially result in a creamier texture. Some believe soaking also helps make beans more digestible by breaking down some of the complex sugars (oligosaccharides) that can cause gas. A standard soak involves covering the beans with several inches of fresh water and letting them sit for 8 hours or overnight at room temperature.
Cons of Soaking: It requires planning ahead. If you forget to soak, you face a much longer cooking time or need to use a pressure cooker. Adzuki beans are small enough that the difference in cooking time between soaked and unsoaked isn’t as dramatic as with, say, chickpeas or kidney beans, especially when using a pressure cooker.
Quick Soaking Method: If you’re short on time but still want some benefits of soaking, you can quick-soak. Place rinsed beans in a pot, cover with water by about 2 inches, bring to a rolling boil, cook for 2-3 minutes, then turn off the heat, cover the pot, and let the beans sit for 1 hour. Drain, rinse, and proceed with your chosen cooking method.
Ultimately, the choice is yours. If you have the time and prefer the potential benefits, soak them. If you’re using a pressure cooker or don’t mind a slightly longer stovetop simmer, skipping the soak is perfectly fine.
Cooking Your Adzuki Beans: Choose Your Method
Regardless of the method, the first step is always the same: Rinse your beans thoroughly! Place the dried beans in a colander and rinse them under cold running water, picking out any stones, debris, or broken beans.
Stovetop Method
This is the classic approach. It requires a bit more attention but gives you good control.
- Combine: Place the rinsed beans (soaked or unsoaked) in a large, heavy-bottomed pot. If using kombu, add the strip now.
- Add Water: Cover the beans with plenty of fresh, cold water – about 2-3 inches above the level of the beans. Beans absorb a lot of water as they cook.
- Boil & Simmer: Bring the water to a rolling boil over high heat. Once boiling, skim off any foam that rises to the surface with a spoon. Then, reduce the heat to low, cover the pot loosely (leaving the lid slightly ajar to prevent boiling over), and let the beans simmer gently.
- Cook Time:
- Soaked Beans: Simmer for 45-60 minutes.
- Unsoaked Beans: Simmer for 60-90 minutes, or potentially longer.
- Check Doneness: Start checking around the minimum time. See ‘Checking for Doneness’ section below.
Pressure Cooker (Instant Pot) Method
This is arguably the fastest and most hands-off method.
- Combine: Place the rinsed beans (soaked or unsoaked) in the inner pot of your pressure cooker. Add the kombu strip, if using.
- Add Water: Add fresh water. The ratio is less critical than stovetop as there’s minimal evaporation, but ensure the beans are covered by at least 1 inch of water. A common ratio is 1 cup beans to 3-4 cups water. Do not fill the pressure cooker more than half-full with beans and water combined.
- Seal & Cook: Secure the lid, ensuring the steam release valve is set to ‘Sealing’. Select the ‘Pressure Cook’ or ‘Manual’ setting on High Pressure.
- Soaked Beans: Cook for 9-12 minutes.
- Unsoaked Beans: Cook for 15-20 minutes.
- Natural Release: Once the cooking time is up, let the pressure release naturally (NPR) for at least 15-20 minutes. This allows the beans to continue cooking gently and helps them retain their shape. After the natural release period, you can perform a quick release (QR) for any remaining pressure according to your manufacturer’s instructions.
- Check Doneness: Carefully open the lid and check the beans.
Slow Cooker Method
Ideal for setting up in the morning and having beans ready later in the day.
- Combine: Place the rinsed beans (soaked or unsoaked) in the slow cooker crock. Add the kombu, if using.
- Add Water: Cover beans with water by about 2 inches.
- Cook: Cover and cook on LOW for 6-8 hours or on HIGH for 3-4 hours. Unsoaked beans will likely require the longer end of these time ranges, potentially even more.
- Check Doneness: Test for tenderness towards the end of the cooking cycle. Slow cooker times can vary significantly.
Checking for Doneness
Perfectly cooked adzuki beans should be tender and creamy all the way through, easily mashed between your fingers or with a fork, but not completely disintegrated or mushy (unless you’re aiming for a puree). The best way to check is to taste a few! Scoop out 2-3 beans, let them cool slightly, and bite into them. If they are still firm or chalky in the center, continue cooking, checking every 10-15 minutes (stovetop/slow cooker) or adding a few more minutes of pressure cooking time if needed. Remember they will firm up slightly as they cool.
Important Cooking Note: Undercooked beans, including adzuki beans, can contain lectins like phytohaemagglutinin which can cause digestive upset. Always ensure your beans are cooked thoroughly until tender. Boiling for at least 10 minutes (which happens during the initial phase of all these methods) helps to destroy these compounds. Never eat raw or undercooked dried beans.
Cooling and Storing Your Bounty
Once your beans are cooked to perfection, proper cooling and storage are key to maintaining quality and safety.
- Cooling: Let the beans cool down in their cooking liquid for about 30 minutes to an hour. This helps them absorb more flavour and prevents the skins from splitting or drying out as they cool rapidly. Afterwards, you can drain them (reserving the cooking liquid, known as aquafaba, for other uses if desired) or store them in some of their liquid. Spreading them on a baking sheet can speed up cooling if you’re in a hurry before refrigerating or freezing.
- Refrigeration: Transfer the cooled beans (with or without some liquid) to airtight containers. They will keep well in the refrigerator for 4-5 days.
- Freezing: For longer storage, freezing is excellent. Portion the cooled beans into freezer-safe containers or heavy-duty freezer bags. You can freeze them with some of their cooking liquid to prevent freezer burn, or drain them well first. Leave some headspace in containers as the liquid will expand. Label clearly with the date. Frozen adzuki beans maintain good quality for up to 6 months.
- Thawing: Thaw frozen beans overnight in the refrigerator or use them directly from frozen in soups and stews where they will heat through.
Putting Your Batch-Cooked Adzuki Beans to Use
Now for the fun part! Here are just a few ideas to get you started:
- Sweet Red Bean Paste (Anko): The classic! Mash cooked beans with sugar (and optionally a pinch of salt) to create smooth (koshian) or chunky (tsubu’an) paste for mochi, dorayaki, pastries, or simply swirling into yogurt.
- Dessert Toppings: Whole cooked beans (lightly sweetened or unsweetened) are great over ice cream, shaved ice, yogurt parfaits, or oatmeal.
- Adzuki Bean Soup (Savory): Simmer cooked beans with vegetable broth, diced vegetables (carrots, celery, onion), garlic, ginger, and perhaps some miso paste or soy sauce for a comforting soup.
- Salads: Add a scoop of drained, cooked beans to green salads, grain salads (quinoa, farro, rice), or pasta salads for a boost of protein and fiber. They pair well with vinaigrettes.
- Grain Bowls: Build a nourishing bowl with a base of rice or another grain, topped with adzuki beans, roasted vegetables, greens, and a flavorful dressing (tahini-lemon, miso-ginger).
- Stews and Curries: Incorporate them into hearty vegetable stews or coconut-based curries. They absorb flavours wonderfully.
- Veggie Burgers/Loaves: Mash adzuki beans with breadcrumbs, sautéed onions, herbs, and spices to form patties or a loaf mixture.
- Dips and Spreads: Blend cooked adzuki beans with tahini, lemon juice, garlic (like a hummus variation), or with savory spices for a unique dip.
Tips for Batch Cooking Success
- Seasoning: It’s generally recommended to add salt towards the end of the cooking time (last 15-20 minutes) or after the beans are cooked. Adding salt too early is sometimes thought to toughen the bean skins and potentially increase cooking time, although opinions on this vary. Seasoning later allows you more control, especially since you might use the beans in both sweet and savory dishes.
- Kombu Power: Adding a strip of dried kombu seaweed during cooking infuses a subtle umami flavour and contains enzymes that some believe help break down the complex sugars in beans, potentially aiding digestibility. Remove the kombu before storing.
- Water Level Management: Keep an eye on the water level, especially when cooking on the stovetop. Ensure beans remain submerged; add boiling water if needed to maintain temperature.
- Don’t Overcook: Unless you’re specifically making a puree or paste, aim for beans that are tender but hold their shape.
Batch cooking adzuki beans is a simple, rewarding practice that streamlines meal preparation and adds a versatile, nutritious ingredient to your culinary repertoire. Give it a try, and enjoy the convenience and flavour all week long!


