Let’s talk about making life just a little bit easier, especially during busy weeknights. One simple trick that can seriously streamline your meal prep is batch cooking brown rice. Instead of waiting 40-50 minutes for it to cook every time you want it, imagine having perfectly cooked, fluffy brown rice ready to go in your fridge or freezer. It sounds simple, and honestly, it really is. It’s a game-changer for quick lunches, speedy dinners, and generally keeping your healthy eating goals on track without adding extra stress.
Why brown rice, though? Sure, white rice is quicker, but brown rice brings a lovely nutty flavour and a slightly chewier texture to the table. It’s the whole grain version, meaning it retains the bran and germ, unlike its white counterpart. This gives it a bit more substance and character, making it a fantastic base for all sorts of dishes. By cooking up a big batch, you get all the goodness without the repetitive cooking time.
Embracing the Batch Cook
The main hurdle with brown rice is undoubtedly its longer cooking time compared to white rice. Standing over a pot for nearly an hour isn’t always practical when hunger strikes or you’re juggling multiple tasks. This is precisely why batch cooking is the perfect solution. Invest a bit of time once – maybe on a Sunday afternoon or whenever you have a spare hour – and you reap the rewards all week long. You’ll cook a larger quantity than you normally would, then store it properly for future meals.
What You’ll Need
Getting set up for batch cooking brown rice doesn’t require fancy gadgets, though some can make it even easier. Here’s the basic rundown:
- Brown Rice: Choose your favourite type – short grain, medium grain, long grain, basmati, jasmine – they all work! Just note that cooking times might vary slightly. Buying in bulk can also save you money.
- A Large Pot with a Tight-Fitting Lid: If you’re using the stovetop method, ensure your pot is big enough to handle the expanded volume of cooked rice without boiling over. A heavy bottom is ideal for even heat distribution.
- Alternatively: A Rice Cooker or Pressure Cooker (like an Instant Pot): These appliances can make the process more hands-off. Ensure your model is large enough for the batch size you intend to cook.
- Water or Broth: Water is standard, but using vegetable, chicken, or beef broth can infuse your rice with extra flavour right from the start.
- Salt (Optional): A pinch of salt enhances the natural flavour of the rice.
- Oil or Butter (Optional): A small amount can help prevent sticking and add a touch of richness.
- Measuring Cups and Spoons: Essential for getting the rice-to-liquid ratio correct.
- A Fine-Mesh Sieve: Useful for rinsing the rice beforehand.
- Airtight Containers or Freezer Bags: Crucial for proper storage. Choose sizes that make sense for your typical meal portions.
- Baking Sheet (Optional but Recommended): Helpful for cooling the rice quickly.
The Cooking Process: Step-by-Step
Alright, let’s get cooking! Choose the method that works best for you and your kitchen setup.
Step 1: Measure and Rinse (Highly Recommended)
First, decide how much rice you want to cook. A good starting point for a batch cook might be 2-4 cups of dry brown rice, which will yield roughly 6-12 cups of cooked rice. Measure your desired amount. While rinsing isn’t strictly mandatory for brown rice like it is for some white varieties (to remove surface starch), giving it a good rinse under cold water using a fine-mesh sieve is still a good idea. Swirl the rice with your hand until the water runs clearer. This helps remove any dust or debris.
Step 2: Choose Your Cooking Method
Method 1: The Classic Stovetop
This is the most common method if you don’t have a dedicated appliance.
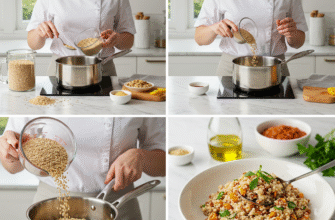
- Combine Ingredients: Place the rinsed brown rice in your large pot. Add the cooking liquid. The generally recommended ratio for brown rice is 1 part rice to 2 or 2.5 parts liquid. For example, for 2 cups of rice, use 4 to 5 cups of water or broth. Add salt and oil/butter now, if using.
- Bring to a Boil: Place the pot over high heat and bring the liquid to a rolling boil.
- Simmer and Cover: Once boiling, give it one quick stir (stirring too much can make it gummy), then immediately reduce the heat to the lowest possible setting that maintains a gentle simmer. Cover the pot tightly with the lid. Do not lift the lid while it simmers!
- Cook: Let the rice simmer gently for about 40-50 minutes. Cooking times can vary depending on the specific type of brown rice, the age of the rice, and your stove, so check the package instructions as a guideline.
- Rest: Once the time is up (or most of the liquid seems absorbed if you peek *quickly*), turn off the heat completely. Let the pot stand, still covered, for another 10-15 minutes. This resting period is crucial – it allows the residual steam to finish cooking the grains evenly and helps prevent sticking.
- Fluff: After resting, remove the lid and gently fluff the rice with a fork to separate the grains.
Method 2: The Reliable Rice Cooker
If you have a rice cooker, especially one with a brown rice setting, this is incredibly easy.
- Combine Ingredients: Add the rinsed rice, water or broth (follow the ratio recommended by your rice cooker manual or use the 1:2 rice-to-liquid ratio as a starting point), and optional salt/oil to the rice cooker bowl.
- Cook: Close the lid, select the “Brown Rice” setting if available (otherwise, use the standard “Cook” setting), and let the machine do its work. It will automatically switch to the “Keep Warm” setting when done.
- Rest: Allow the rice to rest on the “Keep Warm” setting for about 10-15 minutes after cooking finishes before opening the lid.
- Fluff: Open the cooker and fluff the rice with the provided paddle or a fork.
Method 3: The Speedy Pressure Cooker (Instant Pot)
This is the fastest way to cook brown rice.
- Combine Ingredients: Place rinsed rice, liquid (a common ratio for Instant Pots is 1 part rice to 1.25 parts water, but check your model’s guide), and optional salt/oil into the inner pot.
- Seal and Cook: Secure the lid, ensure the steam release valve is set to “Sealing”. Select the “Manual” or “Pressure Cook” setting, and set the timer. For most brown rice, 20-24 minutes at high pressure is typical.
- Natural Release: Once the cooking cycle is complete, allow the pressure to release naturally for at least 10-15 minutes. This helps the rice texture. After that, you can perform a quick release for any remaining pressure.
- Fluff: Carefully open the lid and fluff the rice with a fork.
Cooling and Storing: The Crucial Step
Once your mountain of fluffy brown rice is cooked, proper cooling and storage are essential for both food safety and quality. Cooked rice can be a breeding ground for bacteria (specifically Bacillus cereus) if left at room temperature for too long.
Cool It Quickly: Don’t let the cooked rice sit out on the counter or in the pot for more than an hour. The best way to cool it rapidly is to spread it out in a thin layer on one or two large baking sheets. This increases the surface area and allows the heat to dissipate quickly. You can even place the baking sheet in the fridge (uncovered for a short while) to speed things up further.
Important Food Safety Note: Never leave cooked rice sitting at room temperature for longer than one hour. Bacteria can multiply rapidly between 40°F and 140°F (4°C and 60°C). Cooling rice quickly and refrigerating or freezing it promptly is crucial to prevent potential foodborne illness.
Storing Your Batch
Once the rice is cooled (ideally close to room temperature or slightly chilled), it’s time to store it.
- Refrigeration: Portion the cooled rice into airtight containers. Label them with the date if you like. Properly stored, cooked brown rice will last for about 3-4 days in the refrigerator.
- Freezing: For longer storage, freezing is your best bet. Portion the cooled rice into airtight containers or heavy-duty freezer bags. Try to press out as much air as possible from bags to prevent freezer burn. Frozen brown rice maintains good quality for about 1-2 months, though it can be safe for longer. Freezing in individual or family-sized portions makes reheating much more convenient.
Reheating Your Pre-Cooked Rice
Reheating brown rice is simple, but the key is to add a little moisture back in to prevent it from drying out.
- Microwave: Place the desired amount of rice in a microwave-safe bowl. Add a tablespoon or two of water or broth per cup of rice. Cover the bowl loosely (with a microwave-safe lid, plate, or damp paper towel) to trap steam. Microwave on high for 1-3 minutes, depending on the amount, stirring halfway through, until heated thoroughly.
- Stovetop: Add the rice to a saucepan with a splash of water or broth. Cover the pan and heat over medium-low heat, stirring occasionally, until warmed through. This method takes a bit longer but can yield excellent results.
- From Frozen: You can reheat frozen rice directly using either method above; just increase the reheating time. Alternatively, you can thaw it in the refrigerator overnight before reheating.
Putting Your Batch Cooked Rice to Work
Now for the fun part! Having cooked brown rice ready opens up a world of quick and easy meal possibilities:
- Speedy Stir-Fries: Add cold, day-old rice directly to your wok or pan towards the end of cooking your stir-fry ingredients. Leftover rice fries up beautifully.
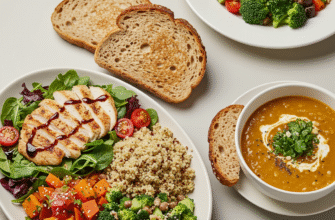
- Quick Grain Bowls: Build a healthy lunch or dinner bowl by topping a scoop of rice with your favourite protein (chicken, beans, tofu), roasted or fresh veggies, and a tasty dressing.
- Fast Side Dishes: Simply reheat the rice and serve alongside any main course. You can easily jazz it up by stirring in some herbs, spices, peas, or toasted nuts.
- Burrito Fillings: Mix rice with beans, salsa, and cheese for quick burrito or taco fillings.
- Soup Enhancer: Add a scoop of cooked rice to soups or stews near the end of cooking time to make them more substantial.
- Fried Rice: Cold, leftover rice is essential for making great fried rice!
Troubleshooting Tips
- Mushy Rice? This usually happens from too much liquid or overcooking. Next time, try slightly less water or reduce the cooking time a bit. Ensure you’re fluffing, not mashing, the rice after cooking.
- Hard or Undercooked Rice? Likely caused by too little liquid, cooking too fast (heat too high), or not letting it rest long enough. Add a few tablespoons more water, cover, and cook on low for another 10-15 minutes. Ensure the lid fits tightly during cooking and resting.
- Sticking to the Pot? A little oil added before cooking can help. Also, ensure you let the rice rest off the heat for the full 10-15 minutes – this helps release it from the bottom. Avoid stirring during simmering.
Batch cooking brown rice is a simple habit that pays off significantly in saved time and effort throughout the week. It makes wholesome eating more accessible, even on the busiest days. Give it a try – future you will definitely appreciate having a stash of perfectly cooked brown rice ready and waiting!

