Let’s talk about reclaiming your mornings. That frantic scramble for something, anything, to eat before rushing out the door? It doesn’t have to be the norm. Imagine waking up to a ready-made, wholesome breakfast that just needs a quick reheat or can even be enjoyed cold. This isn’t some breakfast fantasy; it’s the reality offered by batch cooking oats. It sounds simple, maybe even a little boring, but mastering the art of cooking oats ahead of time is a genuine game-changer for busy weeks.
Why bother, you ask? Well, beyond dodging the morning chaos, batch cooking oats saves you precious time. Instead of spending 10-20 minutes each morning cooking a single serving, you invest maybe 30-60 minutes once a week to prepare multiple breakfasts. Think about that cumulative time saving! It also encourages healthier choices. When a nutritious option is readily available, you’re far less likely to grab a sugary cereal or an expensive, less-than-ideal takeaway breakfast. Plus, buying oats in bulk is significantly cheaper than individual oatmeal packets or breakfast bars. It’s a win for your schedule, your health, and your wallet.
Getting Started: The Basics of Batch Cooking Oats
The core idea is straightforward: cook a large quantity of oats at once, portion it out, and store it for later use. The beauty lies in its flexibility. You can tailor the cooking method, the type of oats, and the flavourings to your preferences. Whether you prefer creamy stovetop oats, hearty steel-cut oats, or convenient baked oatmeal cups, there’s a batch-cooking strategy for you.
Choosing Your Oats:
- Rolled Oats (Old-Fashioned): These are the most common choice for batch cooking. They strike a good balance between cooking time and texture, holding up reasonably well after reheating. They absorb liquid well and become creamy.
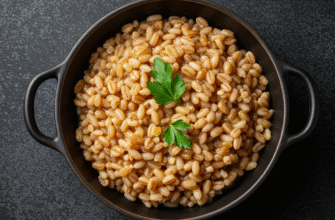
- Steel-Cut Oats: These take longer to cook initially but offer a chewier, nuttier texture that holds up exceptionally well to batch cooking and reheating. They are less processed than rolled oats.
- Instant Oats: While convenient for single servings, instant oats aren’t generally recommended for batch cooking. They tend to become mushy and lose their texture when prepared in large quantities and stored. Stick to rolled or steel-cut for best results.
Popular Batch Cooking Methods
Here are a few reliable ways to cook your oats in bulk:
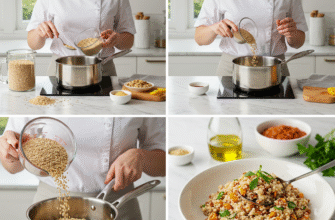
The Classic Stovetop Method (Scaled Up)
This is essentially making regular oatmeal, just much more of it. It works best with rolled oats or steel-cut oats (adjusting cooking time accordingly).
The Process:
- Determine your ratio: The standard ratio is often 1 part oats to 2 parts liquid (water, milk, or a mix). For batch cooking, especially if you plan to add mix-ins later, you might want slightly less liquid initially, perhaps 1 part oats to 1.75 parts liquid, as you can always add more when reheating. For steel-cut oats, the ratio is typically 1 part oats to 3 or 4 parts liquid.
- Choose a large pot: Ensure your pot is big enough to accommodate the oats expanding as they cook. You don’t want an oatmeal volcano on your stove!
- Combine and Cook: Bring your liquid to a simmer (don’t boil vigorously if using milk, to prevent scorching). Stir in the oats and a pinch of salt (salt enhances the flavour). Reduce the heat to low, cover partially, and simmer gently, stirring occasionally to prevent sticking.
- Cooking Time: Rolled oats will take about 10-20 minutes, depending on how creamy you like them. Steel-cut oats will require significantly longer, typically 25-40 minutes, or even more, until they are tender but still slightly chewy.
- Cool Completely: This is crucial. Let the cooked oats cool down fully before portioning and storing.
Oven-Baked Oatmeal
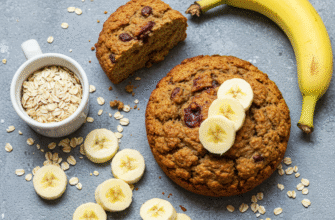
Baked oatmeal is fantastic for batch cooking. It holds its shape well, making it easy to slice into portions or bake directly into muffin tins for grab-and-go servings. It has a firmer, more cake-like texture than stovetop oats.
The Process:
- Preheat Your Oven: Usually around 375°F (190°C).
- Mix Dry Ingredients: In a large bowl, combine rolled oats (steel-cut don’t work as well here unless pre-soaked), baking powder (for a little lift), cinnamon or other spices, and salt.
- Mix Wet Ingredients: In a separate bowl, whisk together milk (dairy or non-dairy), eggs (or flax eggs for vegan), a sweetener like maple syrup or honey (optional), melted butter or oil (optional, for richness), and vanilla extract.
- Combine and Add Mix-ins: Pour the wet ingredients into the dry and stir until just combined. Don’t overmix. Gently fold in any desired mix-ins like berries, chopped nuts, or chocolate chips.
- Bake: Pour the mixture into a greased baking dish (e.g., 9×13 inch) or portion it into greased muffin tins. Bake for 25-40 minutes for a large dish, or 18-25 minutes for muffin cups, until the center is set and the edges are lightly golden.
- Cool Completely: Let it cool entirely before slicing or removing from muffin tins.
Slow Cooker Steel-Cut Oats
For the ultimate hands-off approach, especially for steel-cut oats, the slow cooker is your friend. You can set it up overnight and wake up to a massive batch of perfectly cooked oats.
The Process:
- Grease the Slow Cooker: Liberally grease the inside of your slow cooker insert with butter or cooking spray. This is vital to prevent sticking and burning, especially around the edges.
- Combine Ingredients: Add steel-cut oats, liquid (water, milk, or a combination – typically a 1:4 ratio of oats to liquid for slow cooking), a pinch of salt, and any sturdy flavourings like cinnamon sticks or dried fruit. Avoid adding fresh fruit or milk that might curdle until the end or upon reheating.
- Cook on Low: Cook on the low setting for 6-8 hours, or overnight. Avoid cooking on high, as it’s more likely to scorch.
- Stir and Cool: Once cooked, give it a good stir. It might look watery on top, but stirring will incorporate everything. Let it cool completely.
Storage and Reheating: Keeping it Fresh
Proper storage is key to enjoying your batch-cooked oats all week long.
Cooling is Non-Negotiable: Always let your oats cool completely at room temperature before transferring them to storage containers. Putting hot food directly into the fridge can create condensation and affect texture, and more importantly, it can create an environment where bacteria might thrive more easily.
Portioning: Divide the cooled oats into individual airtight containers. Mason jars, glass containers, or BPA-free plastic containers all work well. Portioning makes grab-and-go or quick reheating much simpler.
Refrigeration: Stored properly in airtight containers, batch-cooked oats will typically last for 4-5 days in the refrigerator. Baked oatmeal might last slightly longer.
Freezing: For longer storage, oats freeze surprisingly well! Portion cooled oats into freezer-safe containers or freezer bags. Stovetop or slow cooker oats might freeze best if slightly undercooked initially. Baked oatmeal portions freeze excellently. They can last for 2-3 months in the freezer. Thaw overnight in the refrigerator before reheating.
Important Storage Note: Always ensure your oats are completely cool before sealing containers and refrigerating. Trapped heat and moisture create an ideal environment for bacterial growth. If your oats smell off, look discolored, or have any mold, discard them immediately. Proper cooling and airtight storage are essential for food safety.
Reheating Techniques:
- Microwave: Place a portion in a microwave-safe bowl. Add a splash of liquid (water or milk) to help loosen it up and prevent drying out. Microwave on high for 1-2 minutes, stirring halfway through, until heated to your liking.
- Stovetop: Transfer a portion to a small saucepan. Add a splash of liquid. Heat over medium-low heat, stirring frequently, until warmed through. This method often yields the creamiest results for stovetop or slow-cooker oats.
- Oven/Toaster Oven: Baked oatmeal portions can be reheated in an oven or toaster oven at around 350°F (175°C) for 5-10 minutes until warm.
- Enjoy Cold: Many people enjoy their pre-cooked oats cold, especially stovetop or slow cooker oats, treating them like overnight oats. Baked oatmeal cups are also great cold or at room temperature.
Flavoring Your Batches: Keeping Breakfast Exciting
Plain oats are a blank canvas! While you can add some flavourings during the initial cooking (like cinnamon or vanilla), much of the variety comes from toppings and mix-ins added just before serving or upon reheating. This prevents flavours from becoming muddled and textures from getting weird during storage.
Ideas for Add-Ins (Add before serving):
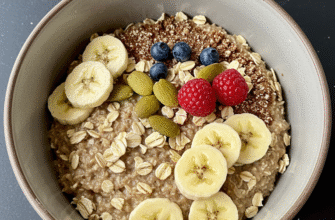
- Fresh or Frozen Fruit: Berries, sliced banana, chopped apple, peaches.
- Nuts and Seeds: Almonds, walnuts, pecans, chia seeds, flax seeds, pumpkin seeds, sunflower seeds.
- Nut Butters: Peanut butter, almond butter, cashew butter, sunflower seed butter.
- Sweeteners: Maple syrup, honey, brown sugar, date paste (add sparingly).
- Spices: Extra cinnamon, nutmeg, cardamom, ginger.
- Other Goodies: Shredded coconut, chocolate chips (dark, milk, or white), granola for crunch, yogurt (especially Greek yogurt for protein).
Think about flavour combinations! Apple cinnamon, peanut butter banana, berry almond, pumpkin spice (pumpkin puree added during reheating + spices), chocolate coconut… the possibilities are endless. Preparing a big batch of plain or lightly spiced oats allows you the flexibility to create a different breakfast experience each day of the week just by changing your toppings.
Batch cooking oats is more than just a meal prep hack; it’s a strategy for simplifying your life, improving your morning routine, and ensuring you start your day with a satisfying, nourishing meal. Give it a try – pick a method, cook up a big batch this weekend, and see how much smoother your weekday mornings become. You might just find yourself becoming an oatmeal batch-cooking convert!

