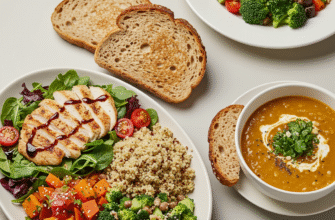
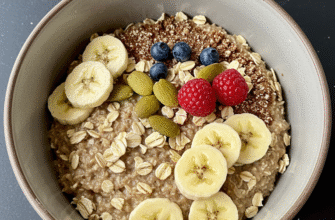
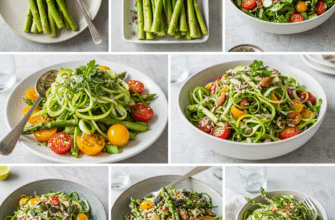
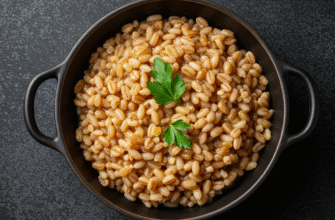
Getting ahead in the kitchen is a game-changer. Imagine opening your fridge and having a key component ready for multiple meals throughout the week. That’s the magic of batch cooking, and one of the absolute superstars for this approach is the humble red lentil. Forget complicated meal prep plans; simply cooking a big batch of these quick-cooking legumes can unlock a surprising amount of culinary freedom and save you precious time on busy weeknights.
Red lentils are fantastic because they cook down relatively quickly compared to their green or brown cousins, transforming into a softer, almost creamy texture. This makes them incredibly versatile. You’re not just cooking a side dish; you’re creating a base ingredient that can be morphed into countless different things. Plus, prepping them couldn’t be easier. It’s a low-effort, high-reward strategy for anyone looking to eat well without spending hours chained to the stove every single day.
Why Choose Red Lentils for Batch Cooking?
So, why focus on
red lentils specifically? Several factors make them ideal candidates for cooking in large quantities:
- Speed: Unlike beans or even other lentil varieties that can take an hour or more, red lentils (especially split red lentils) can be fully cooked in as little as 15-20 minutes on the stovetop. This significantly cuts down your active cooking time during the batch prep session.
- Texture: Once cooked, red lentils break down more readily than firmer lentils. While this might not be ideal if you want distinct lentils in a salad (though you can achieve this with careful cooking), it’s perfect for creating smooth soups, creamy dals, hearty fillings, or thick sauces where they blend seamlessly.
- Versatility: Their mild, slightly sweet flavour profile makes them a blank canvas. They readily absorb the flavours of spices, herbs, broths, and sauces, meaning your batch-cooked lentils can be steered in countless culinary directions – Indian, Mediterranean, Mexican, or simply as a neutral protein boost.
- Simplicity: No overnight soaking required! A quick rinse is all they need before hitting the pot. This removes potential debris and surface starches.
The Simple Art of Cooking Red Lentils in Bulk
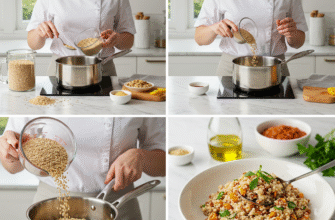
Alright, let’s get down to the actual process. It’s refreshingly straightforward. You don’t need fancy equipment, just a decent-sized pot.
Step 1: Measure and Rinse
Decide how much you want to cook. A good starting point might be 1-2 dry cups, which will yield a substantial amount once cooked (roughly 3-6 cups). Remember, they expand! Pour your desired amount of dry red lentils into a fine-mesh sieve. Rinse them thoroughly under cold running water. Swish them around with your hand. You’ll notice the water running cloudy at first; keep rinsing until it runs mostly clear. This step is important for removing any dust or small particles and helps improve the final texture and digestibility.
Step 2: Choose Your Liquid and Ratio
The general ratio for cooking red lentils on the stovetop is typically
1 part lentils to 3 parts liquid. So, for 1 cup of dry lentils, you’ll use 3 cups of liquid. You can adjust this slightly depending on your desired final consistency – use a little less liquid (say, 2.5 parts) if you want thicker, less soupy lentils, or a bit more if you’re aiming for a very soft, porridge-like result.
Your liquid choice matters!
- Water: The most basic option. It results in a neutral flavour, perfect if you plan to use the lentils in many different recipes.
- Vegetable or Chicken Broth: This instantly infuses the lentils with more flavour right from the start. Highly recommended if you have a general idea of how you’ll use them (e.g., savoury applications).
Step 3: Cooking on the Stovetop
Combine the rinsed lentils and your chosen liquid in a large pot or saucepan. At this stage, you can add some basic aromatics for background flavour if you like – think a bay leaf, a peeled clove of garlic (left whole to be easily removed later), or a slice of onion. Avoid adding salt or acidic ingredients (like lemon juice or tomatoes) at the beginning, as this can sometimes toughen the lentils and increase cooking time.
Bring the mixture to a boil over medium-high heat. Once it’s boiling, immediately reduce the heat to low, cover the pot loosely (leaving a small gap for steam to escape), and let it simmer gently. Stir occasionally to prevent sticking, especially towards the end of the cooking time.
Cooking time will vary slightly depending on the age of your lentils and how vigorous your simmer is, but generally, split red lentils will be tender and cooked through in
15-20 minutes. Whole red lentils might take slightly longer, perhaps 20-25 minutes. Start checking around the 15-minute mark. They are done when they are soft and tender. For most batch-cooking purposes, cooking them until they are quite soft and starting to break down is perfectly fine, even desirable.
Check for Doneness: Properly cooked red lentils should be tender and easily mashed with a fork. For batch cooking, slightly overcooking them (where they start to lose their shape) is often preferable for use in soups, stews, and purees. Taste a few to ensure they are soft throughout, with no hard centres.
Step 4: Seasoning (Optional Now or Later)
Once the lentils are cooked to your liking, remove them from the heat. Remove any large aromatics like the bay leaf or garlic clove. Now you can stir in salt and pepper to taste. If you cooked them in plain water, this is crucial. If you used broth, you might need less salt. Keeping the initial seasoning minimal (or just salt and pepper) maintains maximum versatility for later use. You can always add more specific spices when you incorporate the lentils into a final dish.
Storing Your Prepped Lentils Safely
Proper storage is key to making your batch cooking effort worthwhile.
Cooling Down
Never put a large batch of hot lentils directly into the fridge or freezer. Allow the cooked lentils to cool down substantially at room temperature first. Spread them out on a baking sheet for faster cooling, or simply leave them in the pot (off the heat) with the lid off, stirring occasionally. Aim to get them cooled and stored within about two hours of finishing cooking for food safety.
Refrigeration
Once cooled, transfer the lentils to airtight containers. Glass or BPA-free plastic containers work well. Store them in the refrigerator, and they should stay good for
3-5 days. This makes them readily available for quick lunches or dinners throughout the week.
Freezing for Longer Storage
Red lentils freeze beautifully! This is where batch cooking really shines for long-term convenience.
- Portioning: Consider freezing them in usable portions. Use smaller airtight containers, freezer-safe zip-top bags, or even muffin tins (freeze until solid, then transfer the pucks to a larger bag). Portion sizes like 1 or 2 cups are often convenient.
- Labeling: Always label your containers or bags with the contents and the date they were frozen.
- Freezing Flat: If using bags, lay them flat in the freezer initially. Once frozen solid, they can be stacked vertically like files, saving space.
Cooked red lentils can be stored in the freezer for
up to 3 months for best quality. They are still safe to eat after that, but the texture might degrade slightly over time.
Thawing Frozen Lentils
The best way to thaw frozen lentils is overnight in the refrigerator. You can also thaw them more quickly using the defrost setting on your microwave or by placing the sealed container/bag in a bowl of cold water (change the water every 30 minutes). Alternatively, you can often add frozen cooked lentils directly to simmering soups, stews, or sauces – they’ll thaw quickly in the hot liquid.
Endless Ways to Use Your Batch-Cooked Red Lentils
Okay, you’ve done the prep, and your fridge or freezer is stocked. Now for the fun part – using them! Here are just a few ideas to get you started:
Quick Soups and Stews
This is perhaps the easiest use. Simply stir a cup or two of your cooked lentils into simmering vegetable soup, chicken soup, minestrone, or chili during the last 10-15 minutes of cooking. They add thickness, protein, and substance instantly. You can also blend some of the lentils with broth to create a super quick and creamy lentil soup base.
Hearty Salads
While very soft red lentils might not hold their shape perfectly, slightly firmer cooked ones (or even the softer ones!) can be added to salads for a protein boost. Combine them with chopped cucumbers, tomatoes, onions, herbs (parsley, mint, cilantro), a lemon vinaigrette, and maybe some feta cheese for a Mediterranean-inspired bowl. They also work well in grain salads.
Simple Dips and Spreads
Mash cooked red lentils with a fork or give them a quick blitz in a food processor. Add lemon juice, tahini (optional), garlic, cumin, salt, and a drizzle of olive oil for a hummus-like dip. Or, mash them with salsa and spices for a quick bean-dip alternative. Spread on crackers, toast, or use as a veggie dip.
Pasta Sauce Booster
Stir cooked lentils into your favourite tomato-based pasta sauce (like marinara or bolognese). They blend in beautifully, adding thickness and making the sauce more filling and nutritious without dramatically changing the flavour profile. It’s a great way to stretch meat sauces further or create a satisfying vegetarian option.
Texture Consideration: Remember that red lentils cook down soft. If you want distinct lentils in a dish like a cold salad, be careful not to overcook them during the initial batch prep. Cook only until just tender, perhaps using slightly less water (e.g., 1 part lentils to 2.5 parts water) and checking frequently after 12-15 minutes.
Filling for Wraps, Tacos, or Veggie Burgers
Mash or lightly process the lentils and mix them with breadcrumbs, sautéed onions and garlic, spices (like cumin, chili powder, paprika), and perhaps a binder like a flax egg or a regular egg. Form into patties for simple veggie burgers or use the mixture as a filling for tacos, burritos, or lettuce wraps.
Combine with Grains
Mix cooked lentils with cooked rice, quinoa, couscous, or bulgur wheat. Season simply with herbs, spices, or a light dressing for an easy and balanced side dish or light lunch.
Tips for Batch Cooking Success
A few extra pointers to ensure your red lentil batch cooking is always a success:
- Don’t Fear Blandness (Initially): Cooking the lentils with minimal seasoning (just water/broth and maybe salt at the end) makes them more versatile. You can always add bold flavours later when incorporating them into specific recipes.
- Adjust Consistency Post-Cooking: If your stored lentils seem too thick when you go to use them, simply stir in a little water or broth to reach the desired consistency. If they seem too thin for a specific use (like patties), you can gently simmer them for a few extra minutes to evaporate some liquid.
- Spice it Up During Cooking: If you know you’ll primarily use the lentils for Indian-inspired dishes, feel free to add spices like turmeric, cumin seeds, coriander, or garam masala during the initial cooking process along with the liquid.
- Use a Large Enough Pot: Lentils expand and can sometimes foam up when boiling. Use a pot that is large enough to prevent boiling over.
Making batch-cooked red lentils a regular part of your routine is a simple yet powerful way to streamline meal prep. It takes minimal effort upfront but pays off significantly during busy weeks, offering a ready-to-go, versatile ingredient that can easily be transformed into numerous satisfying meals. Give it a try – you might be surprised how much easier healthy eating becomes!


