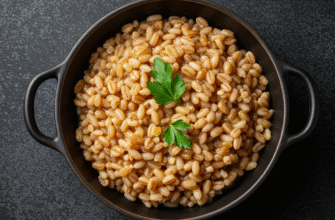
Forget those tins languishing in the pantry! Cooking dried beans from scratch might sound like something only your grandmother did, but honestly, it’s incredibly simple and unlocks a world of superior flavour and texture. Plus, let’s talk savings – dried beans are ridiculously cheap compared to their canned cousins. You get way more bang for your buck, control exactly what goes into them (hello, lower sodium!), and end up with beans that are perfectly tender, creamy, or toothsome, just how you like them. Ready to ditch the can opener for good? Let’s dive into the ridiculously easy process of making perfect homemade beans every single time.
First Things First: Prep Your Pulses
Before you even think about water or heat, you need to give your dried beans a quick once-over. It sounds basic, but it’s important. Dump your measured beans onto a large plate or baking sheet with a light-coloured surface. Spread them out in a single layer.
Why bother? You’re looking for little stowaways. Think tiny pebbles, shrivelled or broken beans, or bits of field debris that might have hitched a ride. It doesn’t happen often with commercially packaged beans these days, but it’s always worth a quick check. Pick out anything that doesn’t look like a perfect bean.
Once you’ve sorted them, give them a good rinse. Pop them into a colander and run cool water over them, swirling them around with your hand. This washes away any surface dust or dirt. Now, they’re ready for the next step.
The Great Soak Debate: To Soak or Not to Soak?
Ah, soaking. This is where opinions can diverge, but let’s break it down simply. Soaking dried beans before cooking does a couple of key things: it rehydrates them, which significantly shortens the cooking time, and some folks find it helps make the beans easier to digest by breaking down some of the complex sugars that can cause, well, you know… gas.
However, some beans don’t really need soaking, especially smaller varieties like lentils, split peas, or even black-eyed peas. Larger, tougher beans like kidney beans, chickpeas, pinto beans, and cannellini beans definitely benefit from it.
Soaking Methods Explained
If you decide to soak, you’ve got options:
- The Long Soak (Overnight): This is the classic method. Place your rinsed beans in a large bowl or pot. Cover them with plenty of cool water – aim for about 3-4 inches of water above the beans, as they will swell up considerably. Leave them on the counter (if your kitchen is cool) or in the fridge (if it’s warm) for 8-12 hours, or simply overnight. Drain and rinse before cooking.
- The Quick Soak: Need beans faster? Place rinsed beans in a saucepan. Cover with about 2 inches of water. Bring the water to a rolling boil and boil for just 2-3 minutes. Then, remove the pot from the heat, cover it tightly with a lid, and let the beans sit in the hot water for 1 hour. Drain, rinse, and they’re ready to cook!
Important Soaking Note: If you’re doing a long soak and your kitchen is very warm, it’s best to soak the beans in the refrigerator. Soaking for too long at warm room temperatures (over 12-16 hours, depending on heat) can cause the beans to start fermenting, leading to off-flavours. Always drain and rinse soaked beans thoroughly before cooking.
What if you skip soaking? You totally can, even with larger beans! Just know that your cooking time will be significantly longer, potentially double or even triple the time compared to soaked beans. You’ll also need to add more water during the cooking process as the beans absorb it.
Let’s Get Cooking: The Simmering Stage
Okay, your beans are sorted, rinsed, and maybe soaked. Now for the main event: cooking them to tender perfection. The stovetop method is straightforward and gives you lots of control.
Stovetop Bean Cooking Steps
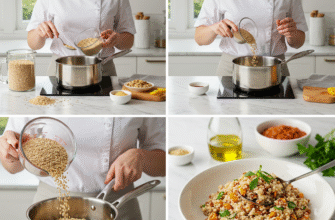
- Combine Beans and Water: Place your prepared beans (soaked or unsoaked) into a large, heavy-bottomed pot. Add fresh water to cover the beans by about 2-3 inches. If you didn’t soak, you might need a bit more water. Using broth (vegetable or chicken) instead of water adds instant flavour, but water works perfectly fine.
- Bring to a Boil: Place the pot over medium-high heat and bring the water to a boil.
- Skim the Foam (Optional but Recommended): As the beans start to boil, you might notice some foamy scum rising to the surface. This is mostly protein and starch released from the beans. Skimming it off with a spoon for the first 10-15 minutes can result in a cleaner taste and clearer cooking liquid, but it’s not strictly essential if you forget.
- Reduce Heat and Simmer: Once you’ve skimmed (or decided not to), reduce the heat to low, so the water is at a gentle simmer. You want just a few bubbles breaking the surface, not a rolling boil. A vigorous boil can cause the beans to break apart and cook unevenly.
- Cover Partially: Cover the pot with a lid, but leave it slightly ajar. This allows some steam to escape and prevents the pot from boiling over, while still keeping enough heat in to cook efficiently.
- Cook Until Tender: Now comes the waiting game. Cooking time varies wildly depending on the type of bean, its age (older beans take longer), whether you soaked them, and even the hardness of your water.
- Soaked large beans (kidney, pinto, chickpeas): 1 to 2 hours
- Unsoaked large beans: 2 to 4 hours (or more!)
- Smaller beans (black beans, navy beans): 45 minutes to 1.5 hours (soaked), potentially longer if unsoaked.
- Lentils and split peas (usually unsoaked): 20 to 45 minutes.
- Season Near the End: We’ll talk more about flavouring next, but hold off on adding salt or acidic ingredients (like tomatoes or vinegar) until the beans are almost tender. Adding them too early is believed by many to toughen the bean skins, extending cooking time.
Alternative Methods: While stovetop is great, you can also cook beans beautifully in a slow cooker (low for 6-8 hours, high for 3-4, generally) or a pressure cooker/Instant Pot (times vary greatly by bean type, but significantly faster – often 20-40 minutes at high pressure after soaking, plus natural release time). These are fantastic hands-off options!
Infusing Flavour: Beyond Basic Beans
Plain cooked beans are fine, but why stop there? Infusing flavour during the cooking process makes a huge difference.
When to Add Salt: As mentioned, the conventional wisdom is to add salt during the last 15-30 minutes of cooking, once the beans are nearly tender. This helps prevent the skins from getting tough. Some modern tests suggest this might be less critical than once thought, but it’s a safe rule to follow. Use about 1-1.5 teaspoons of salt per pound of dried beans as a starting point, tasting and adjusting near the end.
Aromatics are Your Friends: This is where the magic happens! Add these to the pot along with the beans and water at the very beginning:
- Onion: A halved or quartered onion (peel on is fine).
- Garlic: A few whole, smashed cloves (no need to peel).
- Bay Leaf: One or two dried bay leaves add a subtle savoury depth. Remove before serving.
- Herbs: Hardy herbs like sprigs of fresh rosemary, thyme, or sage can go in early. Add delicate herbs like parsley or cilantro stems at the start for background flavour, or chopped fresh leaves at the end for brightness.
- Peppercorns: A few whole black peppercorns.
- Veggies: A chunk of carrot or celery adds sweetness.
Other Flavour Boosters:
- Use vegetable, chicken, or beef broth instead of some or all of the water.
- Add a smoked ham hock, smoked turkey wing, or a piece of bacon/pancetta for deep, smoky flavour (remove before serving or shred the meat into the beans).
- A strip of kombu (dried seaweed) is often used in Japanese cooking; it’s said to help soften beans and enhance umami, plus potentially aid digestion.
Experiment! Find the combinations you love. Remember to remove any large aromatics like onion halves or bay leaves before storing or serving.
Storing Your Delicious Homemade Beans
You’ve done it! You have a pot of perfectly cooked, flavourful beans. Chances are, you’ve made more than you need for one meal, which is one of the great advantages.
Refrigerating: Let the beans cool completely in their cooking liquid. This liquid, often called pot liquor (or ‘pot likker’), is full of flavour and helps keep the beans moist. Transfer the beans and their liquid to airtight containers. They will keep well in the refrigerator for 4-5 days.
Freezing: Cooked beans freeze beautifully! Once cooled, portion the beans along with some of their cooking liquid into freezer-safe containers or heavy-duty freezer bags. Leave a little headspace for expansion. They’ll last for at least 3-6 months in the freezer. Thaw them in the refrigerator overnight before using.
Verified Advantage: Cooking dried beans is significantly more cost-effective than buying canned beans. A one-pound bag of dried beans typically yields 6-7 cups of cooked beans, equivalent to about 4 standard cans. You also gain complete control over the sodium content and avoid preservatives or BPA often found in can linings.
Troubleshooting Common Bean Blips
Sometimes things don’t go quite perfectly. Here are common issues and how to fix them:
- Beans are still hard after hours of cooking: This usually happens with very old beans or sometimes due to hard water. Add a tiny pinch (about 1/4 teaspoon per pound of dried beans) of baking soda to the cooking water – this alkaline environment can help soften stubborn beans. Don’t overdo it, or they can get mushy and taste soapy. Keep simmering!
- Beans turned out mushy or split: You likely cooked them at too high a heat (a rolling boil instead of a gentle simmer) or simply cooked them too long. Next time, use lower heat and start checking for doneness earlier. Mushy beans are still great for refried beans, dips, or thickening soups!
- Beans taste bland: You probably under-salted or didn’t use enough aromatics. Don’t be afraid to season generously, especially with salt, towards the end of cooking. Taste the cooking liquid – it should taste pleasantly seasoned. You can always stir in more salt, herbs, or a squeeze of lemon/vinegar after cooking to liven them up.
Go Forth and Cook Beans!
See? Cooking dried beans isn’t complicated at all. It mostly requires a little bit of time and patience, but the hands-on part is minimal. The payoff in flavour, texture, cost savings, and knowing exactly what’s in your food is huge. Start with an easy bean like pinto or black beans, experiment with seasonings, and soon you’ll be whipping up batches of delicious homemade beans like a pro. Your soups, stews, salads, dips, and side dishes will thank you!


