
Content
Why Bother Making Oat Creamer Yourself?
Good question! While grabbing a carton off the shelf is convenient, making it at home offers several advantages. Firstly, cost-effectiveness. Rolled oats are incredibly cheap compared to commercially produced oat creamers. You can make a batch for a fraction of the price. Secondly, ingredient control. Many store-bought creamers contain oils, gums (like xanthan gum or gellan gum), phosphates, and added sugars to achieve that desired texture and shelf stability. When you make it yourself, you know exactly what’s going in – often just oats, water, a touch of sweetener, and maybe some vanilla. Thirdly, customization is key. Want it thicker? Less sweet? Maple-flavored? Mocha-infused? You’re the boss! Adjust the ratios and add flavorings to create your perfect coffee companion. Lastly, it reduces packaging waste. Making your own means fewer cartons heading to landfill or recycling centers. It’s a small but positive step towards a less wasteful kitchen.Gather Your Simple Ingredients
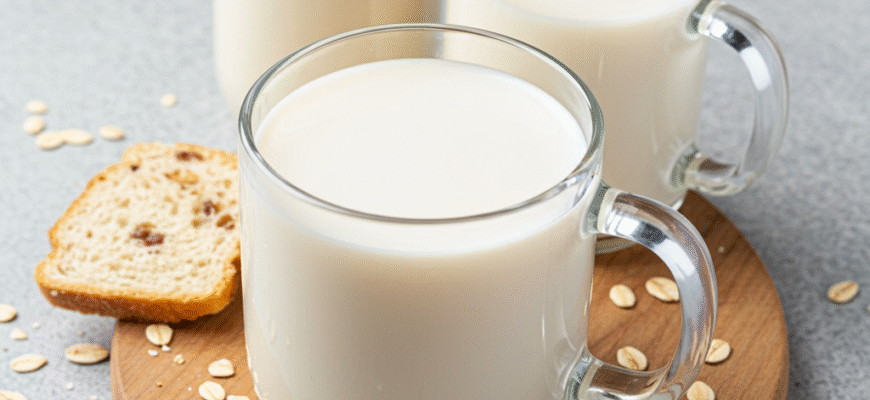
The beauty of homemade oat milk creamer lies in its simplicity. You likely have most, if not all, of these ingredients already:- Rolled Oats: Stick with old-fashioned rolled oats. Avoid steel-cut oats (they don’t blend well for this purpose) and instant oats (they can become overly gummy). Gluten-free certified oats are necessary if you have celiac disease or a gluten sensitivity. About 1/2 to 1 cup is usually a good starting point, depending on desired thickness.
- Water: Filtered water is recommended for the best taste. You’ll need cold water for blending, typically 2 to 3 cups. The less water you use relative to the oats, the creamier the result will be.
- Sweetener (Optional): Maple syrup is a popular choice for its flavor and liquid form. Dates (pitted), agave nectar, or even a simple sugar syrup work well too. Start with 1-2 tablespoons and adjust to your preference. You can always add more later.
- Flavor Enhancer (Optional): A splash of vanilla extract (about 1/2 teaspoon) adds a lovely warmth. A tiny pinch of salt can also enhance the overall flavor profile and balance the sweetness.
- Fat for Richness (Optional but Recommended): To mimic the richness of dairy cream or commercial creamers, adding a neutral-flavored oil like refined coconut oil (melted), sunflower oil, or even a bit of cashew butter (about 1 tablespoon) can make a big difference. This helps create a creamier mouthfeel and prevents it from separating quite as quickly in hot beverages.
Essential Equipment
You don’t need fancy gadgets, just a few kitchen staples:- Blender: A high-speed blender works best for achieving the smoothest consistency, but a standard blender will also do the job. You might just need to blend slightly longer or strain more carefully.
- Fine Mesh Strainer or Nut Milk Bag: This is crucial for separating the oat pulp from the liquid creamer. A nut milk bag generally yields the smoothest result, but a fine-mesh sieve lined with cheesecloth (doubled up) also works well. Avoid pushing the pulp through the strainer, as this can lead to a slimy texture.
- Bowl: For straining the blended mixture into.
- Airtight Container: For storing your finished creamer in the refrigerator (a glass jar or bottle works perfectly).
Step-by-Step Guide to Creamy Oat Goodness
1. Prepare the Oats (Optional Quick Soak)
Some people like to give their oats a quick rinse under cold water to remove surface starch, which can sometimes contribute to sliminess. Another optional step is a very short soak: place your 1/2 cup of rolled oats in a bowl and cover with cold water. Let them sit for just 10-15 minutes – no longer! Soaking for extended periods is a common cause of unwanted slimy texture. After the brief soak, drain the oats thoroughly and rinse them again under cold running water. Pat them slightly dry if you like. Many recipes skip soaking altogether, adding the dry oats directly to the blender, which also works fine and might be preferable if you’ve had issues with sliminess before.2. Blend Everything Up
Combine the rinsed (or dry) oats, 2 cups of cold filtered water, your chosen sweetener (start small), vanilla extract (if using), pinch of salt, and optional fat source (like melted coconut oil or cashew butter) in your blender. Using cold water is vital; warm or hot water will activate the starches in the oats far too quickly, resulting in that dreaded slime. Now, blend on high speed, but only for about 30 to 45 seconds. Seriously, don’t overdo it! Over-blending heats the mixture and breaks down the oats too much, which again, leads straight to a gummy, slimy texture rather than a smooth, creamy one. You just want to blend long enough for the oats to break down and the mixture to look milky.Listen up, this is important! The number one enemy of perfect homemade oat milk or creamer is sliminess. This usually happens from over-blending, using hot water, or soaking the oats for too long. Keep your blending time under a minute, always use icy cold water, and consider skipping the soak or keeping it very brief (under 15 mins) followed by a good rinse. Resist the urge to squeeze the pulp hard when straining too!
3. Strain Like a Pro
Position your nut milk bag or fine-mesh sieve lined with cheesecloth over a clean bowl. Carefully pour the blended oat mixture into the bag or sieve. If using a bag, gently squeeze it to extract the liquid creamer. If using a sieve, let the liquid drain through naturally. Do not press down hard on the oat pulp left in the sieve or squeeze the bag excessively. Applying too much pressure forces fine oat particles and starches through, which contributes significantly to a slimy end product. Patience here yields a much better texture. You’re aiming for the smooth liquid, not every last drop if it means compromising quality.4. Taste and Adjust
Once you’ve collected the liquid creamer in the bowl, give it a taste. Need more sweetness? Stir in a little more maple syrup or your chosen sweetener. Want more vanilla flavor? Add another drop or two. This is your chance to perfect it before bottling.5. Store Your Creation
Pour the finished oat milk creamer into your airtight glass jar or bottle. Seal it tightly and store it in the refrigerator. Homemade oat creamer doesn’t contain the preservatives and stabilizers found in commercial versions, so its shelf life is shorter.Tips for Achieving Oat Creamer Perfection
Thickness Control
The ratio of oats to water is your primary tool for controlling thickness. For a richer, thicker creamer, start with 1/2 cup of oats to 2 cups of water. If you want it even thicker, try 3/4 cup or even 1 cup of oats to 2 cups of water, understanding you’ll get less yield but a much creamier result. Conversely, if your batch seems too thick, you can always stir in a little more cold water until it reaches your desired consistency.Dealing with Separation
Natural separation is completely normal for homemade oat creamer because it lacks emulsifiers. You’ll likely see water settling at the bottom or solids rising to the top after it sits in the fridge. Don’t worry! Just give the container a good shake before each use to recombine everything. Adding a small amount of fat (like refined coconut oil or sunflower lecithin, if you have it) during blending can help minimize separation but won’t eliminate it entirely.Boosting Creaminess
Beyond adjusting the oat-to-water ratio and adding a fat source, some people find that adding 1-2 tablespoons of soaked cashews (soaked for at least 4 hours or quick-soaked in boiling water for 15 minutes, then drained) to the blender along with the oats can significantly enhance creaminess without adding a strong flavor. Cashews blend into a very smooth, rich cream.What About the Pulp?
Don’t throw away the leftover oat pulp from straining! It’s packed with fiber. You can add it to smoothies, oatmeal, pancake or waffle batter, baked goods like muffins or cookies, or even mix it into veggie burger patties. It’s a great way to reduce food waste.Fun Flavor Variations
Once you’ve mastered the basic recipe, get creative! Here are a few ideas:- Mocha Creamer: Add 1-2 teaspoons of unsweetened cocoa powder and maybe a tiny pinch of instant espresso powder to the blender.
- Spiced Creamer: Add 1/4 teaspoon of cinnamon and a pinch of nutmeg or pumpkin pie spice during blending. Perfect for fall!
- Maple Pecan: Use maple syrup as the sweetener and add 1 tablespoon of pecan butter (or soaked pecans) to the blend.
- Lavender Honey: Use honey (if not strictly vegan) as the sweetener and add a tiny amount (1/4 tsp) of culinary lavender buds to the blend (strain well!).
- Coconut Creamer: Use light coconut milk for part of the water or add unsweetened shredded coconut to the blend for extra tropical flavor.


