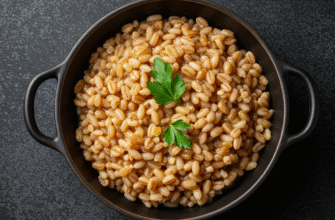
Having cooked grains on hand is a game-changer for quick weeknight meals, speedy lunches, and effortless meal prep. Instead of waiting 20, 30, or even 50 minutes for grains like rice, quinoa, or barley to cook from scratch, imagine having them ready to go in just a few minutes. The secret? Your freezer! Freezing cooked grains is surprisingly simple and incredibly effective, saving you time and reducing food waste. Forget those pricey pre-cooked pouches; mastering the art of freezing grains at home puts you in control and keeps your wallet happier.
Why bother freezing grains? Well, besides the obvious convenience factor, freezing locks in the texture and flavour of perfectly cooked grains remarkably well. Unlike refrigeration, which can sometimes lead to dried-out or oddly textured grains after a few days, freezing halts the degradation process more effectively. It allows you to cook grains in larger batches – a real time-saver – and portion them out for future use. This means less time spent hovering over the stove during busy weeks and more time enjoying delicious, wholesome meals.
What Grains Can You Freeze?
The good news is that most cooked grains freeze beautifully. Here are some popular choices:
- Rice: White, brown, basmati, jasmine, wild rice blends – they all freeze well. Brown rice, being slightly more robust, holds up particularly well.
- Quinoa: This protein-packed pseudo-cereal is a fantastic candidate for freezing.
- Barley: Both pearled and hulled barley freeze nicely, maintaining their chewy texture.
- Farro: Similar to barley, farro’s nutty flavour and satisfying chew are well-preserved by freezing.
- Bulgur: Cooked bulgur wheat freezes without issue.
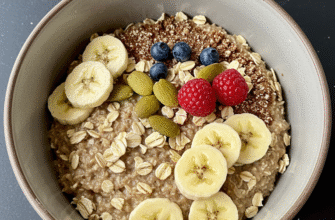
- Oats: Cooked steel-cut oats or rolled oats (oatmeal) can be frozen in portions for quick breakfasts.
- Couscous: While it cooks quickly anyway, freezing leftover cooked couscous is certainly possible.
Essentially, if you can boil it, you can likely freeze it. The key lies in the preparation and cooling process before the grains hit the freezer.
Step-by-Step Guide to Freezing Cooked Grains
Freezing grains isn’t complicated, but following a few key steps ensures the best results when it’s time to thaw and reheat.
1. Cook the Grains Perfectly
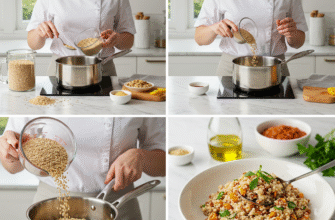
Start by cooking your chosen grain according to the package directions or your preferred method. Aim for perfectly cooked grains – not mushy, but not undercooked either. Slightly al dente can sometimes be beneficial, as the grains will soften a tiny bit more during reheating, but fully cooked is generally fine. Avoid adding excessive butter or oil during the initial cooking if you plan to freeze, as fats can sometimes affect texture upon thawing, though small amounts are usually okay.
2. Cool Completely and Quickly
This is arguably the most crucial step. Hot or even warm grains will create steam inside the storage container or bag. This steam turns into ice crystals, which can lead to sogginess or freezer burn upon thawing. Spread the cooked grains out on a large baking sheet in a thin layer. This maximizes surface area and allows them to cool down much faster. You can place the baking sheet in the refrigerator to speed things up further. Ensure the grains are at room temperature or, ideally, chilled before proceeding.
Do not skip the cooling step! Packaging warm grains traps moisture, leading to large ice crystals. These crystals damage the grain structure, resulting in a mushy texture when reheated. Cool grains thoroughly and quickly by spreading them on a baking sheet before packaging.
3. Portion Control
Think about how you’ll use the grains later. Will you need single servings for lunches? Larger portions for family dinners? Portioning the grains before freezing makes life much easier. You can grab exactly what you need without having to thaw a giant block of frozen rice. Use measuring cups to create consistent portion sizes.
4. Package for Preservation
Proper packaging prevents freezer burn and protects the quality of your grains. You have several options:
- Freezer-Safe Bags: Zip-top freezer bags are a popular choice. Add your portioned, cooled grains, press out as much air as possible before sealing, and flatten the bag for easy stacking. Removing air is key to preventing ice crystals and freezer burn.
- Freezer-Safe Containers: Rigid containers with airtight lids work well, especially if you want stackable options or are avoiding plastic bags. Fill the containers, leaving a small amount of headspace (about half an inch) as the grains might expand slightly upon freezing. Ensure the lids seal tightly.
- Vacuum Sealer: If you own a vacuum sealer, this is an excellent method for removing virtually all air, offering the best protection against freezer burn.
5. Label and Date
Don’t rely on memory! Clearly label each bag or container with the type of grain, the portion size (e.g., “1 cup Brown Rice”), and the date it was frozen. Use a permanent marker. This helps you use the oldest grains first and easily identify what’s what in your freezer stash.
Thawing and Reheating Frozen Grains
When you’re ready to enjoy your pre-cooked grains, reheating them properly helps restore their original texture and taste.
Thawing Options:
- Refrigerator: For best results, thaw the grains overnight in the refrigerator. This gentle thawing helps maintain texture.
- Microwave (Defrost Setting): If you’re short on time, use the defrost setting on your microwave. Be careful not to actually cook the grains during this stage.
- Direct Reheating: Many grains, especially smaller ones like quinoa or rice in smaller portions, can be reheated directly from frozen.
Reheating Methods:
- Microwave: This is often the quickest method. Place the frozen or thawed grains in a microwave-safe bowl. Add a splash of water or broth (about 1 tablespoon per cup of grains) – this creates steam and prevents the grains from drying out. Cover the bowl loosely (to allow steam to escape) and microwave on high for 1-3 minutes (from thawed) or 2-5 minutes (from frozen), stirring halfway through. Adjust timing based on the amount and your microwave’s power. Fluff with a fork before serving.
- Stovetop: Add the frozen or thawed grains to a saucepan with a splash of water or broth. Cover the pan and heat over medium-low heat, stirring occasionally, until heated through. Break up any clumps as the grains warm up. This method gives you good control over the heating process.
A Tip for Texture: If your reheated grains seem a little dry, simply stir in another teaspoon or two of water or broth until they reach your desired consistency. Fluffing with a fork after heating also helps separate the grains.
How Long Do Frozen Grains Last?
Properly packaged and stored cooked grains can maintain good quality in the freezer for quite some time. For the best texture and flavour, aim to use them within 2 to 3 months. While they might remain safe to eat for longer (up to 6 months potentially, especially if vacuum-sealed), their quality might start to decline gradually after the 3-month mark. Always check for signs of freezer burn (dry, discoloured patches) or off-odours before reheating.
Verified Tip: For optimal freshness and texture, use frozen cooked grains within 3 months. While safe beyond this, gradual drying or texture changes may occur. Labelling with the date frozen is essential for tracking usage.
Making the Most of Your Frozen Grain Stash
The possibilities are endless once you have a freezer full of ready-to-go grains:
- Quick Sides: Reheat a portion to serve alongside stir-fries, curries, grilled meats, or fish.
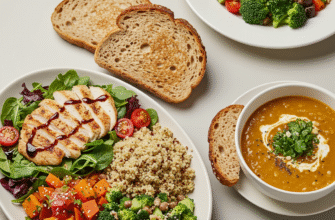
- Grain Bowls: Build nutritious lunch bowls by topping reheated grains with protein, roasted vegetables, and a tasty dressing.
- Soup and Stew Boosters: Stir frozen grains directly into simmering soups or stews during the last few minutes of cooking to add substance and texture.
- Fried Rice Base: Slightly chilled, day-old (or previously frozen and thawed) rice is perfect for making fried rice.
- Salad Additions: Add thawed and cooled grains like quinoa or farro to salads for extra fibre and nutrients.
- Breakfast Prep: Reheat frozen oatmeal portions for a super-fast, hearty breakfast.
Freezing cooked grains is a simple kitchen strategy that pays off big time. It streamlines meal preparation, reduces food waste, and ensures you always have a wholesome base ready for countless meals. By following the steps for proper cooling, packaging, and reheating, you can enjoy perfectly textured grains straight from your freezer whenever hunger strikes. So next time you’re cooking rice, quinoa, or barley, make a double batch and stock your freezer – your future self will thank you!


