Hitting the trail is an amazing way to reconnect with nature, challenge yourself, and get some fantastic exercise. But pushing your body through miles of varying terrain requires fuel – the right kind of fuel. Skimping on nutrition or packing the wrong things can turn an epic adventure into a sluggish slog. Thinking carefully about your hiking meals isn’t just about avoiding hunger; it’s about maintaining energy levels, aiding recovery, and making the whole experience more enjoyable.
Fueling Your Hiking Engine: The Basics
Before diving into specific meal ideas, let’s touch on what your body needs when you’re hiking. Think of your body like a high-performance vehicle; it needs the right fuel mix to run efficiently, especially over long distances or challenging climbs.
Carbohydrates are your primary energy source. They provide the quick-burning fuel needed for muscle contractions. Think whole grains, fruits, and starchy vegetables. You’ll want a steady supply throughout your hike.
Protein is crucial for muscle repair and rebuilding, which is vital during and after strenuous activity. It also contributes to satiety, helping you feel fuller for longer. Lean meats, beans, lentils, nuts, seeds, and jerky are good sources.
Fats often get a bad rap, but healthy fats are essential for long-lasting energy. They burn slower than carbs, providing sustained power for those longer treks. Nuts, seeds, avocados, and olive oil are excellent choices.
Hydration cannot be overstated. Dehydration leads to fatigue, headaches, and poor performance. Water is key, but for long or hot hikes, electrolytes (salts and minerals lost through sweat) are also important.
Pre-Hike Power-Up: Breakfast
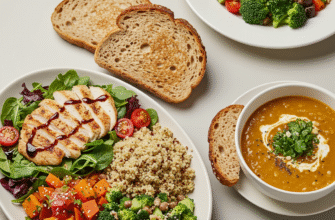
What you eat before you even step onto the trail sets the stage for your energy levels. Aim for a breakfast rich in complex carbohydrates and moderate in protein, eaten about 1-2 hours before you start hiking.
Easy Breakfast Options:
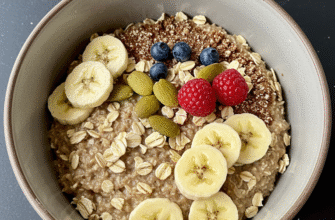
- Oatmeal: A classic for a reason. It provides slow-release energy. Boost it with nuts, seeds, dried fruit, or a scoop of protein powder. Prepare it with water or milk (dairy or plant-based).
- Whole-grain Toast with Eggs or Nut Butter: Simple, effective, and provides a good mix of carbs, protein, and fat.
- Yogurt with Granola and Fruit: Choose plain yogurt (Greek yogurt offers more protein) and add your favorite granola and fresh or dried fruit.
- Smoothie: Blend fruit, spinach, yogurt or protein powder, and a liquid base. Easy to digest, but might not keep you full as long as solid food.
Avoid overly fatty or sugary breakfasts right before a hike, as they can lead to sluggishness or energy crashes.
On-the-Go Grub: Trail Lunches and Snacks
Trail food needs to be portable, relatively non-perishable, energy-dense, and easy to eat with minimal fuss (and minimal mess!). Weight is also a significant consideration, especially on multi-day trips.
DIY Trail Mix (Gorp):
The quintessential hiker’s snack. The beauty of trail mix is its customizability. Combine various ingredients for a balanced mix of carbs, fats, and protein. Consider:
- Nuts & Seeds: Almonds, walnuts, cashews, pumpkin seeds, sunflower seeds (choose unsalted or lightly salted).
- Dried Fruit: Raisins, cranberries, apricots, mango, apple rings (look for unsulfured options without added sugar).
- Grains/Crunch: Whole-grain cereal (like Cheerios or Chex), pretzels, sesame sticks.
- Something Sweet (Optional): Dark chocolate chips, M&Ms, yogurt-covered raisins (use sparingly, especially in hot weather).
Mix and match based on your preferences and energy needs. Portion it out into smaller bags for easy access throughout the day.
Sandwiches and Wraps:
These can be great for day hikes but require a bit more thought to prevent sogginess.
- Choose sturdy bread: Bagels, dense whole-wheat bread, or tortillas/wraps hold up better than soft white bread.
- Pack wet ingredients separately: Keep tomatoes, pickles, or sauces in a small container and add them just before eating.
- Use drier fillings: Cured meats (salami, pepperoni), hard cheese (cheddar, provolone), hummus, peanut butter, or leftover cooked chicken work well. Consider using lettuce leaves as a barrier between the bread and wetter fillings.
- Wrap it right: Wrap tightly in plastic wrap or beeswax wraps, potentially followed by foil for extra protection.
Energy Bars and Bites:
Commercial energy bars are convenient but can be expensive and sometimes packed with sugar. Making your own is often healthier and more cost-effective.
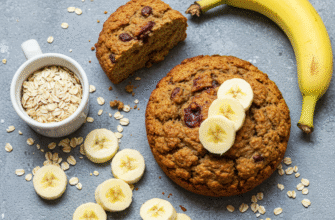
- Homemade Energy Balls: Blend oats, dates (for binding and sweetness), nut butter, seeds (chia, flax), and maybe some cocoa powder or shredded coconut. Roll into balls and chill. They are incredibly energy-dense.
- DIY Granola Bars: Many recipes online use simple ingredients like oats, honey or maple syrup, nuts, and dried fruit. Bake and cut into bars.
Fruits and Vegetables:
Fresh produce adds vitamins and hydration but can be bulky or easily bruised.
- Durable Fruits: Apples, oranges (you have to pack out the peel!).
- Dried Fruits: Lighter and more energy-dense by weight (see Trail Mix).
- Hardy Veggies: Baby carrots, celery sticks, bell pepper strips. Pair with hummus or single-serving nut butter packs.
Other Packable Powerhouses:
- Jerky: Beef, turkey, or salmon jerky provides a good protein hit. Look for lower-sodium options.
- Hard Cheese: Cheddar, Gouda, or Parmesan travel relatively well, especially in cooler weather.
- Nut Butter Packets: Single-serving packets of peanut, almond, or other nut butters are incredibly convenient and energy-rich. Eat them straight or pair with crackers or fruit.
- Tuna/Salmon Pouches: Foil pouches are lighter than cans. Great protein source for lunch. Bring crackers or a tortilla. Remember to pack out the pouch!
- Hard-boiled Eggs: Cooked and peeled beforehand, they offer great protein for the first day out.
Plan for Your Needs! Always pack slightly more food than you think you’ll need in case of unexpected delays or increased exertion. Test unfamiliar foods on shorter hikes first to ensure they agree with your digestive system. Proper food storage is essential to prevent spoilage and avoid attracting wildlife – use bear canisters where required and always pack out everything you pack in.
Dinner Delights: Meals for Overnight Trips
For backpackers carrying gear for multiple days, dinner becomes a balance between nutritional value, weight, ease of preparation, and comfort. Hot meals can be a huge morale booster after a long day.
Commercial Dehydrated/Freeze-Dried Meals:
These are the go-to for many backpackers due to their convenience and light weight. Just add boiling water, wait, and eat, often right out of the pouch.
- Pros: Very lightweight, easy to prepare, long shelf life, wide variety of cuisines available.
- Cons: Can be expensive, sodium levels are often high, taste can be hit-or-miss, packaging creates waste.
Read reviews and check nutritional information before buying. Consider supplementing with extra olive oil for fat or bringing your own spices to enhance flavor.
DIY Backpacking Meals:
Creating your own backpacking meals can save money, reduce packaging waste, and allow you to control ingredients and portion sizes.
- Base Ingredients: Focus on quick-cooking options. Instant couscous, ramen noodles, instant rice, quick-cook pasta, and instant mashed potatoes are popular choices.
- Adding Protein: Packets of tuna/salmon, dried beans (instant refried beans are great), lentils, textured vegetable protein (TVP), freeze-dried chicken, or jerky cut into small pieces.
- Flavor & Nutrients: This is key! Pack small containers or bags of:
- Bouillon cubes/powder
- Dried herbs and spices (garlic powder, onion powder, Italian seasoning, chili powder)
- Nutritional yeast (cheesy flavor, B vitamins)
- Dried mushrooms or vegetables (available online or dehydrate your own)
- Powdered coconut milk (adds richness and fat)
- Olive oil (carried in a small, leak-proof bottle for extra calories and fat)
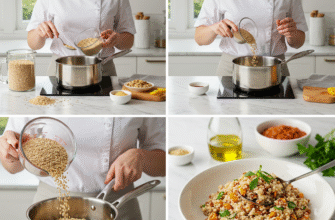
Example DIY Meal: Couscous with Sundried Tomatoes and Tuna. Combine instant couscous, a chicken or vegetable bouillon cube, dried Italian herbs, and sundried tomatoes in a zip-top bag at home. On the trail, boil water, add the couscous mix, let sit covered for 5-10 minutes. Stir in a pouch of tuna and a drizzle of olive oil.
Don’t Forget Hydration!
Water is paramount. Carry more than you think you’ll need, or have a reliable water filter or purification tablets and know where water sources are located along your route. For strenuous hikes, especially in heat, consider adding electrolyte tablets or powders to your water to replenish salts lost through sweat. Sip water consistently throughout your hike, don’t wait until you feel thirsty.
Putting It All Together: Meal Planning
Successful trail nutrition starts before you leave home. Plan your meals based on:
- Hike Duration and Intensity: Longer, harder hikes require more calories.
- Personal Preferences: Pack foods you actually enjoy eating!
- Weight and Bulk: Especially critical for backpacking. Remove excess packaging.
- Weather Conditions: Hot weather increases hydration needs and makes some foods (like chocolate) less practical. Cold weather might make you crave warmer, heartier meals.
- Cooking Gear: Plan meals around whether you’re carrying a stove or going no-cook.
Lay out all your food before packing to visualize your daily intake and ensure you have enough variety and calories. By thoughtfully choosing your meals and snacks, you provide your body with the energy it needs to conquer climbs, enjoy the views, and make the most of your time outdoors. Happy hiking, and happy eating!


