
Content
Choosing Your Canvas: The Right Vinegar Base
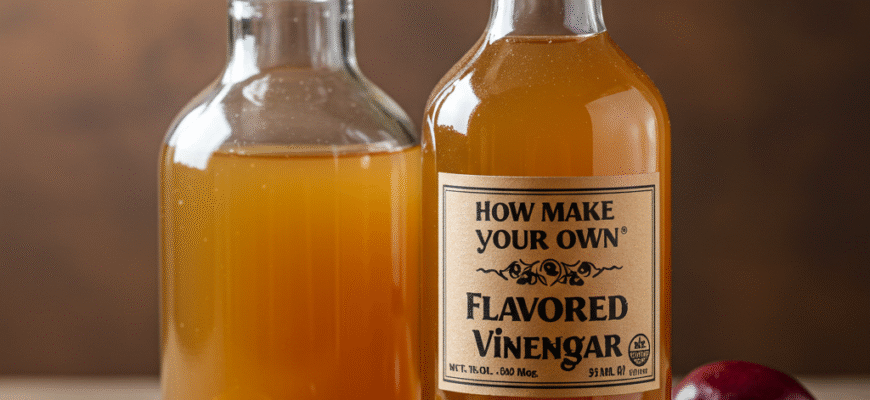
The foundation of your flavored vinegar is, well, the vinegar itself. The type you choose significantly impacts the final taste. Think of it as the canvas upon which you’ll paint your flavors. Not all vinegars are created equal for infusion purposes. White Wine Vinegar: This is a popular choice due to its mild, slightly fruity flavor that doesn’t overpower delicate infusions like herbs or berries. It provides a clean backdrop, allowing the added ingredients to shine. Red Wine Vinegar: Bolder and more robust than its white counterpart, red wine vinegar pairs well with stronger flavors like garlic, rosemary, chili peppers, or dark berries like blackberries. Its deeper color also lends a beautiful hue to the final product. Apple Cider Vinegar: With its distinct fruity tang and reputed health benefits, apple cider vinegar (ACV) is another excellent base. It works beautifully with warm spices like cinnamon and cloves, fruits like apples or pears, and even some herbs like sage or thyme. Opt for raw, unfiltered ACV for potentially more complex results, though filtered works fine too. Rice Vinegar: Exceptionally mild and slightly sweet, rice vinegar (often used in Asian cuisine) is perfect for very delicate flavors like ginger, citrus peel, or mild chilies. Avoid seasoned rice vinegar, which already contains sugar and salt. What to Avoid (Usually): Distilled white vinegar, the kind often used for cleaning, is generally too harsh and acidic for most flavor infusions. Its overpowering sharpness tends to mask rather than complement added ingredients. Stick to the wine, cider, or rice varieties for better culinary results.Gathering Your Palette: Selecting Flavorings
This is where the real fun begins! The possibilities for flavoring your vinegar are practically limitless. Think about flavors you enjoy and how they might pair with the acidity of the vinegar. Here are some popular categories:Fresh Herbs
Herbs are classic choices for infused vinegars. Always use fresh, vibrant herbs that have been thoroughly washed and patted completely dry. Excess water can dilute the vinegar and potentially lead to spoilage. Consider:- Rosemary: Robust, piney flavor. Great with red or white wine vinegar. Pairs well with garlic.
- Thyme: Earthy and versatile. Works well with most vinegars.
- Tarragon: Distinctive anise-like flavor. Classic in white wine vinegar for French-inspired dressings.
- Basil: Sweet and slightly peppery. Excellent with white wine or apple cider vinegar, especially lovely with summer fruit notes.
- Dill: Fresh and grassy. Perfect for white wine or rice vinegar, great for cucumber or fish dishes.
- Mint: Cool and refreshing. Try it with white wine or apple cider vinegar, perhaps combined with berries.
Fruits
Fruits add sweetness, color, and their own unique tang. Berries are particularly popular.- Raspberries/Blackberries/Strawberries: Lend beautiful color and sweet-tart flavor. Use white wine or apple cider vinegar. Mash berries slightly.
- Citrus Peel: Use a vegetable peeler to get wide strips of zest (avoid the bitter white pith) from lemons, oranges, or limes. Adds bright, zesty notes. Works in almost any vinegar base.
- Peaches/Nectarines/Plums: Slice stone fruits and infuse in white wine or apple cider vinegar for a summery flavor.
- Figs: Dried or fresh figs add a deep, jammy sweetness, lovely with red wine or apple cider vinegar.
Spices and Aromatics
Spices and other aromatics add warmth, depth, or heat.- Garlic: Whole, lightly crushed cloves impart pungent flavor. Use sparingly initially; it gets stronger over time. Pairs well with red or white wine vinegar.
- Chili Peppers: Fresh or dried chilies (like red pepper flakes) add heat. Control the intensity by the amount and type of chili used, and whether you include seeds. Start small!
- Ginger: Thinly sliced fresh ginger adds warmth and spice. Great with rice vinegar or apple cider vinegar.
- Peppercorns: Whole black, white, pink, or green peppercorns add subtle heat and complexity.
- Whole Spices: Cinnamon sticks, cloves, star anise, or cardamom pods infuse warm, aromatic notes, perfect for apple cider or red wine vinegar, especially for fall/winter flavors. Lightly crack whole spices before adding.
The Infusion Masterclass: Step-by-Step
Making the vinegar is a straightforward process involving preparation, infusion, and straining.1. Preparation is Key
Cleanliness First: Wash your jars or bottles and their lids thoroughly with hot, soapy water. Rinse well. To sterilize, you can boil them in water for 10 minutes (allow to air dry completely on a clean rack) or run them through a hot cycle in the dishwasher. Ensure everything is bone dry before you start. This prevents unwanted bacteria. Prep Your Flavorings: Wash and thoroughly dry all fresh ingredients (herbs, fruits). Pat them dry with paper towels or let them air dry completely. Moisture is the enemy here. Lightly bruise herb sprigs. Slice or lightly crush fruits. Peel citrus carefully. Lightly crush whole spices or garlic cloves.2. Combine and Steep
Place your chosen flavorings into the sterilized jar. Don’t overcrowd the jar; allow room for the vinegar to circulate. Gently pour your chosen vinegar over the ingredients, ensuring they are completely submerged. This is crucial for preservation. Seal the jar tightly with a non-reactive lid (metal lids can corrode from the acid; use plastic lids or place a layer of plastic wrap or wax paper between the vinegar and a metal lid).Important Safety Note: Always ensure your flavoring ingredients are fully submerged beneath the vinegar. Any herbs, fruits, or spices sticking out above the liquid surface can potentially mold or spoil. Use clean, sterilized jars and lids for safe infusion. Check your infusion periodically during the steeping process.Label the jar with the contents and the date you started the infusion. Store the jar in a cool, dark place, like a pantry or cupboard. Avoid direct sunlight, which can degrade the flavors and colors.
3. Patience and Tasting
Let the infusion sit for anywhere from 1 to 4 weeks. The time depends on your ingredients and desired intensity. Delicate herbs might infuse faster (1-2 weeks), while robust spices, garlic, or dense fruits might need longer (3-4 weeks). Give the jar a gentle shake every few days to help distribute the flavors. Start tasting after about a week. Use a clean spoon (don’t double-dip!) or pour a tiny bit out. If the flavor isn’t strong enough, let it steep longer. If it’s perfect, it’s time to strain.4. Strain and Bottle
Line a fine-mesh sieve with a couple of layers of cheesecloth or a coffee filter (if you want extra clarity). Place this over a clean bowl or measuring cup. Carefully pour the vinegar through the sieve, catching the solids. Gently press the solids (if appropriate, like berries) to extract extra liquid, but don’t squeeze too hard, or you might make the vinegar cloudy. Discard the solids. Look at your strained vinegar. If you see any fine sediment, you might want to strain it again through fresh cheesecloth or a coffee filter for a clearer final product. Pour the finished flavored vinegar into clean, sterilized bottles using a funnel. Seal tightly.Tips for Vinegar Victory
- Start Simple: Begin with one or two flavorings per batch (e.g., Raspberry White Wine Vinegar, Garlic-Rosemary Red Wine Vinegar) before attempting complex blends.
- Quality Matters: Use good quality vinegar and the freshest possible ingredients for the best taste.
- Label Everything: Clearly label your finished bottles with the flavor profile and the date it was bottled.
- Small Batches: Especially when experimenting, start with smaller quantities until you perfect a recipe you love.
- Heat Infusion (Optional Advanced): For a quicker infusion (especially with spices or sturdy herbs), you can gently heat the vinegar (do not boil!) before pouring it over the ingredients. Let it cool completely before sealing. However, the cold infusion method generally preserves delicate fresh flavors better.
Unleashing Your Creations: Using Flavored Vinegars
Now for the best part – using your bespoke vinegars!- Salad Dressings: The most obvious use! Whisk 1 part flavored vinegar with 2-3 parts olive oil, a pinch of salt, and pepper. Herb vinegars, fruit vinegars, and garlic vinegars shine here.
- Marinades: Add acidity and flavor to marinades for meats, poultry, fish, or tofu. Garlic, chili, or herb vinegars work well.
- Deglazing: After sautéing meat or vegetables, splash some flavored vinegar into the hot pan to lift the flavorful browned bits (fond) off the bottom, creating a quick pan sauce.
- Finishing Touch: Drizzle berry vinegar over grilled fruit or vanilla ice cream. Splash herb vinegar over roasted vegetables or grilled fish just before serving.
- Pickling: Use mild herb or spice-infused vinegars for quick pickles.
- Drinks: Some fruit vinegars can be used to make shrubs (drinking vinegars) by combining them with sugar and sparkling water.


