
Content
The Building Blocks of a Brilliant Base
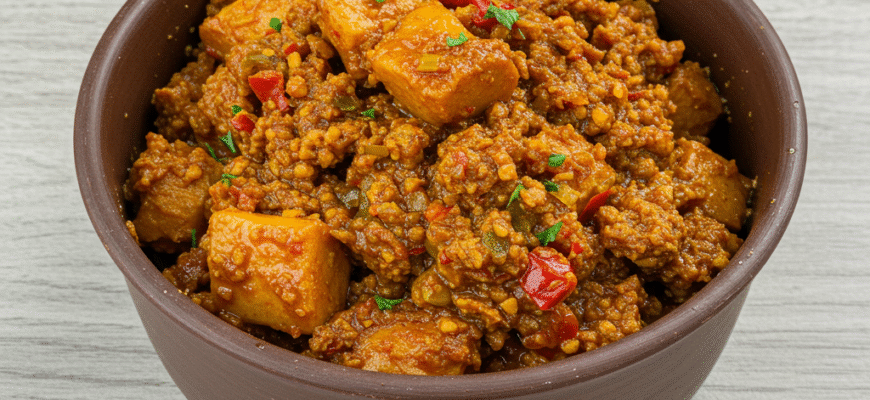
Think of a curry paste base as the foundation upon which you build your final dish. While specific regional curries (Thai green, Indian vindaloo, etc.) have distinct ingredient lists, a versatile ‘base’ paste can be adapted for various styles. The core components generally fall into a few categories:- Aromatics: These provide the pungent, savoury backbone. Think garlic, ginger, and shallots or onions.
- Spices: The heart and soul! This includes whole spices (like cumin seeds, coriander seeds, cloves) that are often toasted, and ground spices (like turmeric, paprika, or cayenne).
- Heat (Optional): Fresh or dried chilies deliver the kick. The type and quantity determine the heat level.
- Binder/Liquid: Sometimes a little liquid (water, vinegar, or oil) is needed to help everything blend into a smooth paste.
- Souring Agent (Optional but common): Ingredients like tamarind paste or vinegar can add a pleasant tang that balances the richness.
Diving Deeper: Choosing Your Ingredients
Let’s break down those categories further. Quality matters here! Aromatics:- Garlic: Don’t be shy! Use fresh, plump cloves. The papery skin should be tight. Avoid cloves that feel soft or have green sprouts (they can be bitter).
- Ginger: Look for firm, smooth skin. You can scrape the skin off with a spoon or peel it thinly with a knife. Its zingy warmth is essential. Galangal is a common substitute or addition in Southeast Asian styles, offering a more citrusy, piney flavour.
- Shallots/Onions: Shallots offer a milder, slightly sweeter flavour often preferred in Southeast Asian pastes. Red or yellow onions work perfectly well too, providing a robust base. Choose firm, dry-skinned bulbs.
- Whole Spices: Buying whole spices and toasting them yourself just before grinding unlocks incredible flavour. Essential starting points include cumin seeds and coriander seeds. Others like cloves, cardamom pods (green or black), cinnamon sticks (or cassia bark), peppercorns, and mustard seeds can be added depending on the desired profile. Toasting happens in a dry pan over medium heat until fragrant – watch carefully to avoid burning!
- Ground Spices: Turmeric is almost non-negotiable for its earthy flavour and vibrant colour (plus its health kudos!). Paprika (sweet or smoked) adds colour and mild sweetness. Cayenne pepper or chili powder brings controllable heat if you aren’t using fresh chilies. Fenugreek (ground or whole seeds) adds a unique bittersweet note common in many Indian curries. Quality and freshness are key for ground spices too; buy small amounts frequently if possible.
- Fresh Chilies: Red or green, the choice impacts flavour as well as heat. Bird’s eye chilies pack a punch, while larger varieties might be milder. Removing the seeds and membrane significantly reduces the heat. Always handle fresh chilies with care – wear gloves if you’re sensitive!
- Dried Chilies: Often soaked in hot water to rehydrate before blending. They offer a deeper, sometimes smoky heat. Varieties range from mild Kashmiri (great for colour) to fiery hot types.
- A splash of water is often enough to get the blender going. Some recipes call for a neutral oil (like vegetable or rapeseed) which also helps preserve the paste. White vinegar can act as both a binder and a souring agent/preservative.
Preparing for Paste Perfection
Mise en place – getting everything prepped before you start blending or pounding – is crucial for a smooth process. Peel and Chop: Peel the garlic, ginger (or galangal), and shallots/onions. Roughly chop them into smaller pieces. This makes the blending or pounding process much easier, ensuring you don’t end up with large, unblended chunks. The smaller the pieces, the smoother the final paste. Toast Spices: If using whole spices, toast them in a dry skillet over medium heat. Keep shaking the pan or stirring constantly. You’ll know they’re ready when they become highly fragrant and might slightly darken – usually just a minute or two. Don’t walk away, as they can burn quickly! Immediately remove them from the hot pan to stop the cooking process. Handle Chilies Safely: If using fresh chilies, decide on your heat level. Remove stems. For less heat, slice them open and scrape out the seeds and white pith using a small spoon (wearing gloves is highly recommended!). Roughly chop them. If using dried chilies, remove stems and seeds, then soak in hot water for 15-20 minutes until softened. Drain before use.Verified Freshness Tip: Making your own curry paste guarantees maximum freshness. The volatile oils in spices and aromatics are most potent right after being processed. This translates directly to a more vibrant and complex flavour in your final curry compared to pastes that have sat on a shelf.
Bringing It All Together: The Making Of
You have two main routes to turn your prepped ingredients into a paste: the traditional mortar and pestle or the modern food processor/blender.Method 1: Mortar and Pestle Power
This is the time-honoured method. It’s more labour-intensive but advocates swear it produces a superior texture and flavour profile. Pounding crushes the ingredients, releasing oils and essences differently than the slicing action of a blade. Start by grinding the toasted whole spices. Add them to the mortar and pound until they form a relatively fine powder. Then, add the hardest ingredients first – typically ginger and garlic. Pound them into a pulp. Gradually add the chopped shallots/onions and chilies, pounding continuously. It takes patience and elbow grease! Add ground spices towards the end. If the mixture is too dry, add a tiny splash of water or oil to help bring it together. You’re aiming for a thick, relatively homogenous paste.Method 2: Blender Brilliance
Much faster and easier! A good food processor or a powerful blender works wonders. If you toasted whole spices, you can grind them first in a dedicated spice grinder or in the blender itself if it’s powerful enough (though sometimes small quantities don’t grind well). Combine all the chopped aromatics (garlic, ginger, shallots/onions), chilies, ground spices, and toasted (and possibly ground) whole spices in the food processor bowl or blender jar. Add a small amount of your chosen liquid (water, vinegar, oil – start with a tablespoon or two). Pulse initially to break everything down, then blend continuously, scraping down the sides as needed. Add more liquid sparingly, only if necessary to get the blades moving and achieve a smooth consistency. Be careful not to add too much liquid, or you’ll have a watery sauce, not a paste.Customization and Variations
This is where the fun really begins! Your basic paste is a canvas.- Thai-Inspired Twist: Add lemongrass (use the tender lower part, finely sliced), galangal instead of or alongside ginger, shrimp paste (for umami depth), and perhaps some cilantro roots/stems. Kaffir lime zest or leaves (finely chopped) add that signature citrusy note.
- Indian-Inspired Flavour: Ensure turmeric, cumin, and coriander are prominent. Consider adding fenugreek, black mustard seeds, or curry leaves (added during cooking, not usually blended into the base paste itself, though some variations exist). A touch of tamarind paste blended in adds authentic tang.
- Go Green: For a green paste variation (common in Thai cuisine), blend in heaps of fresh green herbs like cilantro (leaves and stems) and Thai basil, along with green chilies.
- Rich Red: Use plenty of red chilies (dried Kashmiri chilies are great for colour without excessive heat) and paprika for a vibrant red paste. Roasted red peppers can also be blended in for sweetness and colour.
- Nutty Nuances: Sometimes, nuts or seeds like cashews, peanuts, or sesame seeds are ground into the paste to add richness and thickness.


