That chilly box in your kitchen, the freezer, holds so much potential. Yet, for many of us, it’s more of a frozen tundra filled with mystery bags, ancient leftovers, and ice-encrusted items we vaguely remember buying. Sound familiar? Transforming this neglected space into an organized, healthy haven isn’t just about aesthetics; it’s about saving time, cutting down on food waste, saving money, and making healthy eating significantly easier. Imagine opening your freezer and instantly finding exactly what you need for a quick, nutritious meal. It’s entirely possible, and it starts with a little strategy.
Tackling the Ice Age: The Great Freezer Purge
Before you can organize, you need to know what you’re working with. Brace yourself and prepare to empty the entire freezer. Yes, everything. This might seem daunting, but it’s the most effective way to start fresh. As you pull items out, have a bin or cooler ready for things you intend to keep, and a trash bag for the casualties.
Be ruthless. Check dates religiously. Anything past its prime, severely freezer-burned (covered in dry, greyish spots and excessive ice crystals), or completely unidentifiable needs to go. If you can’t remember what it is or when you froze it, it’s probably not worth keeping. That mystery meat? Bid it farewell. Those peas that look more white than green? Time to part ways. This step is crucial for food safety and for reclaiming valuable space.
Once empty, give the freezer interior a thorough cleaning. Unplug it (consult your manual if needed) or work quickly. Use a solution of warm water and baking soda or a mild dish soap. Avoid harsh chemicals. Wipe down shelves, drawers, and walls. Dry everything completely before plugging it back in or restocking. A clean slate feels good and prevents funky odors from transferring to your food.
Smart Stocking: Building Your Healthy Inventory
Now for the fun part: deciding what goes back in and what healthy staples to add. Think about foods that simplify healthy meal prep.
Frozen Fruits and Vegetables: Nature’s Convenience
These are non-negotiable for a healthy freezer. They’re picked at peak ripeness and flash-frozen, locking in nutrients. Often, frozen produce is just as nutritious, if not more so, than fresh varieties that have traveled long distances.
- Berries: Perfect for smoothies, oatmeal, yogurt, or healthy desserts.
- Spinach/Kale: Toss into smoothies, soups, stews, or pasta sauces. You barely taste it, but get the nutritional boost.
- Broccoli/Cauliflower Florets: Roast, steam, or add to stir-fries.
- Peas/Corn/Green Beans: Easy side dishes or additions to casseroles and salads.
- Mixed Vegetables: A quick base for stir-fries or soups.
- Chopped Onions/Peppers: Saves chopping time for countless recipes.
Consider freezing your own seasonal produce too. Blanch vegetables quickly before freezing to preserve texture and color.
Lean Proteins Powerhouse
Buying lean proteins in bulk or on sale and freezing portions saves money and ensures you always have meal foundations ready.
- Chicken Breasts/Thighs: Freeze individually wrapped or in marinade bags.
- Lean Ground Meat/Poultry: Portion into recipe-sized amounts (e.g., 1 pound).
- Fish Fillets: Salmon, cod, tilapia freeze well. Buy frozen or freeze fresh, well-wrapped.
- Shrimp: Raw, peeled, and deveined shrimp thaw quickly for fast meals.
- Plant-Based Proteins: Edamame, pre-cooked beans (freeze flat in bags), tofu (press well first), tempeh.
Whole Grains and Prepped Components
Freezing cooked whole grains or meal components is a game-changer for busy weeknights.
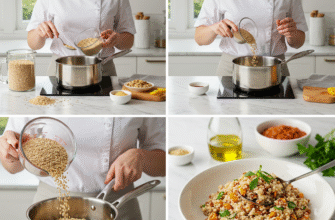
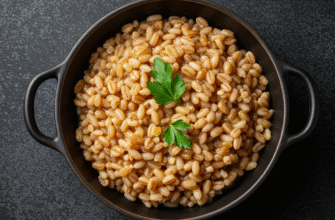
- Cooked Grains: Quinoa, brown rice, farro. Freeze flat in bags, then break off chunks as needed.
- Whole-Grain Bread/Pitas/Tortillas: Prevent spoilage and always have sandwich or wrap options.
- Homemade Broth/Stock: Freeze in ice cube trays or muffin tins, then transfer cubes to a bag. Perfect for adding flavor.
- Sauces: Tomato sauce, pesto (freeze without cheese). Ice cube trays work well here too.
Healthy Pre-Made Meals
Your future self will thank you for freezing complete meals or meal components.
- Soups and Stews: Chili, lentil soup, vegetable soup freeze beautifully.
- Casseroles: Portion into individual or family-sized containers.
- Meatballs/Veggie Burgers: Freeze uncooked on a tray, then transfer to a bag.
- Breakfast Items: Whole-wheat pancakes/waffles, breakfast burritos.
Freezer Temperature Check! For optimal food preservation and safety, your freezer should be set to 0°F (-18°C). Use a separate appliance thermometer to verify the temperature occasionally. Consistent, cold temperatures slow down the processes that degrade food quality and inhibit microbial growth.
Containment Strategy: Choosing the Right Tools
How you store food in the freezer is just as important as what you store. Proper storage prevents freezer burn, makes items easy to identify, and maximizes space.
Containers and Bags
Invest in good quality, freezer-safe containers. Look for options that are airtight and durable.
- Freezer Bags: Versatile for everything from chopped veggies to individual chicken breasts. Squeeze out as much air as possible before sealing to minimize freezer burn. Lay bags flat to freeze; once solid, you can stack them vertically like files.
- Glass Containers: Eco-friendly and non-porous. Ensure they are specifically marked as freezer-safe, as drastic temperature changes can cause some glass to crack. Leave headspace (about an inch) for liquids to expand.
- Plastic Containers: Choose BPA-free, sturdy plastic containers designed for freezing. Square or rectangular shapes stack more efficiently than round ones.
- Silicone Bags/Trays: Reusable and flexible. Great for freezing liquids like broth or sauces in portions (e.g., silicone ice cube trays or Souper Cubes).
- Vacuum Sealer: If you freeze a lot, especially meat or fish, a vacuum sealer is an excellent investment. Removing air significantly extends freezer life and prevents freezer burn.
Portion Control Power
Freeze items in quantities you’re likely to use. Freeze ground beef in one-pound portions, chicken breasts individually, and soup in single or double servings. This avoids thawing more than you need, which saves food and maintains quality (repeated freezing and thawing is generally not recommended).
The Golden Rule: Label Everything!
This cannot be stressed enough. Use permanent markers and freezer tape or labels that won’t fall off in the cold. Clearly write: 1. Contents: Be specific (e.g., “Chicken Chili,” not just “Chili”). 2. Date Frozen: Crucial for knowing what to use first. 3. Quantity/Portion Size: (e.g., “1 lb Ground Turkey,” “2 servings Lentil Soup”). This simple step eliminates guesswork and prevents perfectly good food from languishing because you have no idea what it is or how old it is.
Zone Defense: Organizing Your Freezer Space
Just throwing labeled items back into the freezer leads back to chaos. Create zones or designated areas for different types of food. This makes finding things much faster.
Creating Logical Zones
- Door Shelves: Often the warmest part. Best for less perishable items or things you use frequently that don’t require rock-solid freezing (like nuts, seeds, sometimes butter, or items you’ll use soon). Avoid storing highly perishable items like meat here.
- Top Shelf/Drawer: Ideal for frequently used items, pre-made meals, frozen fruits/veggies for smoothies, bread. Things you grab often.
- Middle Shelf/Drawer: Good for other vegetables, batch-cooked grains, maybe some meats.
- Bottom Shelf/Drawer: Usually the coldest spot. Perfect for raw meats, poultry, fish, and longer-term storage items. Storing raw meat at the bottom also prevents potential drips onto other foods if packaging leaks during thawing.
- Utilize Bins and Baskets: Clear plastic bins are fantastic organizational tools. Group similar items together: a bin for frozen vegetables, one for fruits, one for breakfast items, one for raw meats (to contain leaks). They slide out easily, letting you see what’s behind.
First-In, First-Out (FIFO)
Practice the FIFO principle. When you add new items, place them behind the older ones. This ensures you use up food before it gets too old or develops freezer burn. Your labels with dates are essential for this.
Keeping the System Running: Maintenance Mode
An organized freezer requires a little upkeep. It’s not a one-and-done project.
Regular Check-Ins
Once a month, or at least every couple of months, take a quick inventory. See what needs using up soon. This prevents items from getting lost in the back and helps with meal planning.
Keep an Inventory (Optional but Helpful)
For the super-organized, consider keeping a list. This could be a whiteboard on the freezer door, a magnetic notepad, or a note on your phone. List the contents and cross things off as you use them. This prevents buying duplicates and reminds you of what meal options you have available.
Make it a Habit
Every time you add something new, take the extra 30 seconds to label it properly and put it in its designated zone, rotating older stock forward. It quickly becomes second nature.
Transforming your freezer from a chaotic ice cave into an organized resource for healthy eating is empowering. It requires an initial effort to purge and set up a system, but the payoff in time, money, and mealtime sanity is enormous. You’ll reduce food waste, make healthier choices more accessible, and take the stress out of figuring out “what’s for dinner?”. Open that freezer door with confidence – your future, healthier self is waiting inside.


