
Content
What Exactly Is This Bubbly Jar?
Think of a sourdough starter as a tiny, domesticated ecosystem. It’s a symbiotic community where wild yeasts (like Saccharomyces cerevisiae, though many wild strains exist) and lactic acid bacteria (LAB, primarily Lactobacillus species) coexist and thrive. You provide the home (a jar) and the food (flour and water), and they do the work. The yeasts are primarily responsible for producing carbon dioxide, which is what makes sourdough bread rise – giving it that characteristic open crumb. The bacteria, on the other hand, produce lactic acid and acetic acid. These acids contribute that distinctive tangy flavour profile we associate with sourdough and also help preserve the starter and the final bread by inhibiting the growth of less desirable microbes. It’s a living thing, constantly changing and evolving. Its aroma, activity level, and even consistency can shift subtly from day to day, influenced by temperature, the type of flour you feed it, and the specific microbes that have decided to take up residence. It’s less about following a rigid formula and more about observation and response.Why Bother Making Your Own Starter?
In an age of instant yeast packets, why go through the process of cultivating a starter? For many, it’s about the connection. Nurturing a starter feels less like chemistry and more like caring for a very low-maintenance pet. There’s a certain satisfaction in creating leavening from literally thin air (and flour and water). Beyond the process, there’s the potential for unique flavour. Starters developed in different locations, using different flours, can subtly influence the taste of your bread in ways commercial yeast cannot replicate. It becomes *your* starter, carrying a unique microbial fingerprint. Plus, the ingredients are incredibly basic – flour, water, and time. No complex additives required.Gathering Your Few Supplies
You truly don’t need much to get started. Resist the urge to buy fancy kits initially. Here’s the basic list:- Flour: While you can use all-purpose white flour, starting with a whole grain flour like whole wheat or rye is often recommended. These flours contain more of the bran and germ, which house a greater abundance of the microorganisms you want to cultivate, potentially speeding up the initial process. Once established, you can transition to feeding it with other flours.
- Water: Tap water is often fine, but if yours is heavily chlorinated, it *might* inhibit microbial activity initially. To be safe, you can let tap water sit out overnight for the chlorine to dissipate, or use filtered water. Avoid distilled water as it lacks minerals microbes appreciate. Room temperature water is generally best.
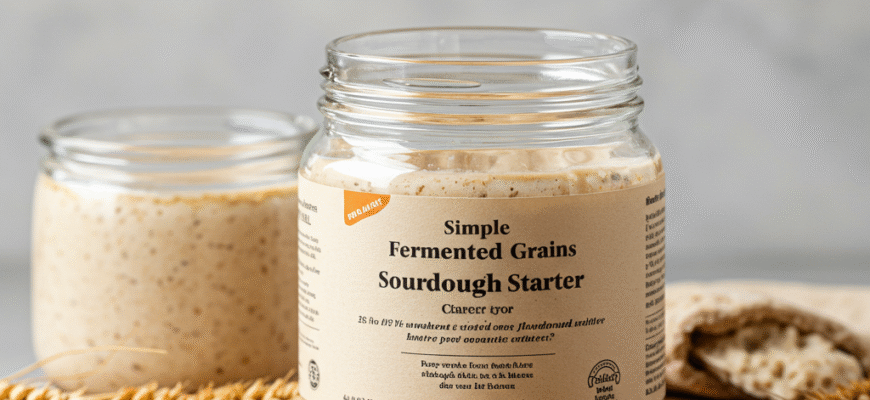
- A Container: A clean glass jar is ideal. Something around 1-quart (or 1-litre) capacity gives the starter room to grow. Glass allows you to easily see the activity – bubbles forming, the rise and fall. Ensure it’s thoroughly clean.
- Something to Stir With: A spoon, spatula, or even chopsticks work fine.
- A Cover: You need to cover the jar to keep out dust and pests, but it shouldn’t be airtight. The yeasts produce CO2, and pressure needs to escape. A loose-fitting lid, a piece of cheesecloth secured with a rubber band, or a coffee filter work well.
- Optional but Recommended: A kitchen scale. Measuring flour and water by weight (grams) is far more accurate and consistent than using volume (cups), leading to more predictable results.
Creating Your Starter: The Day-by-Day Journey
Patience is key here. Your starter won’t be ready overnight. It typically takes about a week, sometimes longer, depending on your environment. Here’s a general guide, but remember to observe *your* starter.Day 1: The Initial Mix
In your clean jar, combine equal weights of flour and water. A good starting point is 50g whole wheat or rye flour and 50g room temperature water. Stir vigorously until no dry flour remains. The consistency should be like a thick pancake batter or paste. Cover loosely and leave it in a relatively warm spot (around 70-75°F or 21-24°C is ideal, but average room temperature usually works). Don’t expect much action yet.Day 2: Observation
You might see a few tiny bubbles, or you might see nothing. The smell might be slightly ‘floury’ or unchanged. Regardless, just give it a good stir, cover it again, and leave it be. Some guides suggest feeding on Day 2, others suggest waiting until Day 3. Observing is more important than rigidly following a schedule. If you see definite bubbles, proceed to Day 3 feeding. If not, waiting another day is fine.Day 3-7 (and maybe beyond): The Feeding Routine
This is where the cycle begins. You’ll start discarding and feeding daily. Why discard? If you just kept adding flour and water, you’d quickly have an unmanageable amount of starter. Discarding removes most of the old mixture, including its waste products (like alcohol and acids), and ensures the fresh ‘food’ (flour and water) isn’t too diluted. It keeps the yeast and bacteria population healthy and active. The Process:- Discard most of the starter. Leave only a small amount in the jar – perhaps 25-50g (roughly a couple of tablespoons). Accuracy isn’t critical here initially; just remove most of it.
- Add fresh flour and water, typically in equal weights to each other and often equal to the amount of starter you kept (a 1:1:1 ratio by weight is common, e.g., 25g starter : 25g flour : 25g water). For now, stick with the same flour you started with.
- Mix thoroughly, scrape down the sides of the jar, cover loosely, and leave it in its warm spot.
Be Patient and Observe! This initial phase can feel slow or unpredictable. Some days might show lots of activity, others less. Strange smells can appear and disappear. Don’t get discouraged if it doesn’t double consistently right away. Just keep feeding it consistently each day and watch for signs of developing strength.
How Do I Know When It’s Ready?
Your starter is generally considered mature and ready for baking when it displays predictable behaviour. This means:- Predictable Rise and Fall: After feeding, it reliably rises (often doubling or more in volume) within a predictable timeframe (usually 4-12 hours, depending on temperature and feeding ratio) and then falls back down.
- Bubbly Texture: It should look visibly active and full of bubbles, almost like a sponge when at its peak height.
- Pleasant Aroma: The initial ‘funky’ smells should mellow into something pleasantly tangy, yeasty, perhaps slightly acidic or fruity, but not foul or overwhelmingly sour.
Keeping Your Starter Alive and Happy: Maintenance
Once your starter is established, you need to maintain it. The key is regular feeding.- Room Temperature Storage: If you plan to bake frequently (several times a week), keep your starter on the counter and feed it daily, or even twice daily if it’s very active or your kitchen is warm. Use the discard/feed routine described earlier.
- Refrigerator Storage: If you bake less often (once a week or less), the refrigerator is your friend. Cold temperatures significantly slow down fermentation. Feed your starter, let it sit at room temperature for an hour or two to get slightly active, then store it in the fridge. Aim to feed it at least once a week. Take it out of the fridge the day before you want to bake, give it one or two feedings at room temperature to wake it up fully before using it in your recipe.
The Discard Dilemma
Discarding part of your starter before feeding might seem wasteful, but it’s crucial for maintaining its health, vigour, and flavour balance. It prevents the starter from becoming overly acidic and ensures the microbes have enough fresh food relative to their population size. But don’t just throw the discard away! Search online for “sourdough discard recipes” (a non-YMYL search!) and you’ll find countless ways to use it in pancakes, waffles, crackers, muffins, and more. These recipes typically rely on the discard for flavour rather than leavening, often using baking soda/powder for lift.Feeding Ratios Matter. The common 1:1:1 ratio (starter:flour:water by weight) works well for many. However, you can adjust this. A higher ratio of fresh flour/water (e.g., 1:2:2 or even 1:5:5) will slow fermentation down, which can be useful in warm environments or if you want to feed less often. Experiment to see what works best for your schedule and starter.
Troubleshooting Common Starter Quirks
Sometimes things don’t go exactly as planned. Here are a few common issues:- Lack of Activity: Often due to temperature (too cold) or inconsistent feeding. Try moving the starter to a warmer spot (like on top of the fridge or in an oven with the light on – be careful not to cook it!). Ensure you’re feeding regularly. Sometimes changing flour type can kickstart things, especially adding a bit of rye.
- Hooch: A layer of dark liquid on top is ‘hooch’. It’s mostly alcohol and water, indicating your starter is hungry and fermentation has slowed. It’s usually harmless. You can pour it off or stir it back in before discarding and feeding. If it appears regularly, try feeding more often or using a higher feeding ratio.
- Weird Smells: As mentioned, some ‘off’ smells (vinegary, cheesy, acetone-like) can occur during the initial creation phase and usually resolve with consistent feeding. However, trust your nose. If it smells truly putrid, rotten, or like garbage, it might be contaminated.
- Mold: Any sign of fuzzy mold (pink, orange, green, black) means contamination. Unfortunately, you cannot salvage this – discard the entire starter and start over with a clean jar and fresh ingredients. Ensure your jar and utensils are always clean.


